
The Search for a Better Button Layout


Most of my posts are about fighting games themselves, but this one is about my attempt at building my ideal arcade stick. My goal was to find the best button layout possible (for me, at least). If you’re interested in my thought process or prototyping your own layouts, you’re in the right place!
Disclaimer: I’m only addressing prototyping layouts in this post. I’m not going to talk about PCBs, wiring, etc. (though I can do that in a future post if anybody is interested).
A Brief History of Retail Arcade Sticks
Commercial arcade sticks usually use one of a handful of popular arcade cabinet button layouts. I bought a Mad Catz TE1 back in 2009 which uses the layout from Vewlix arcade cabinets. Mad Catz had the license to make official Street Fighter IV peripherals, and because SFIV was on Vewlix cabs, Mad Catz used that same button layout on their sticks. Mad Catz dominated the arcade stick market from the SFIV era up through the early PlayStation 4 days (2009 up through 2016 or 2017), and their success at that time helped make the Vewlix layout the most common one you’ll see on retail sticks. I played on the Vewlix layout for well over a decade and never really questioned it.

The Cross|Up
Hit Box Arcade announced a Kickstarter for a new product called the Cross|Up in 2019. After it was officially released, curiosity eventually got the better of me, and I bought one in 2022 (I wrote a whole post about it!) Just like in that post, I’m just going to write the name as “cross-up” from here on out. I really ended up liking it, which eventually got me thinking—if I like this layout better than Vewlix, is there an even better layout out there for me?
In my post about the cross-up, I mostly focused on the utility of the extra buttons around the main button cluster.

It's also interesting to look at the main cluster itself and see what they did with it. In the picture below, I've overlaid the main action buttons from the cross-up layout (in pink) on top of the Vewlix layout (in green). You can see the cross-up layout is quite a bit more compact:
The tighter button spacing made it a lot easier to reach the additional buttons. After getting used to the more compact cross-up layout, I couldn’t go back to Vewlix anymore; it felt like the buttons were miles apart.
Improvements
I think it's pretty reasonable to expect that what's best for me (layout-wise) won't be the best for everybody, but I thought it’d be fun to go through my personal hunt for the perfect layout.
I focus on 2D fighting games like Ultimate Marvel vs. Capcom 3 and Vampire Savior. Marvel has four main action buttons: L, M, H, and S. Having my index finger, middle finger, ring finger, and thumb on those buttons lets me access all of them without having to shift my finger/hand position at all:
It seemed like it would make sense that this would be a good starting point when searching for my layout. I would put four buttons where those four fingers naturally sat when my hand was in a relaxed/comfortable position, and then I could build on that.
When manufacturers started adding a seventh and eighth action button to arcade stick layouts, they almost universally added those buttons to the right:

Fighting games generally required six buttons at most, so for home ports of fighting games, you might end up using these extra buttons for training mode functions like recording the dummy or resetting your screen position. If you do want to use these for actual action buttons though, they can be a bit hard to reach. Your pinky can kind of hit the upper right button, but even then, it's your pinky, the most garbage of the fingers. I always wondered why they didn't put buttons on the left:

You'd have to shift your hand a bit to hit them, but you'd be using two much stronger digits (your thumb/index finger). Also, because you've got those two fingers right there, you could easily hit the two buttons simultaneously if you wanted.
In addition to adding buttons in reachable spots, the more compact you make the button spacing, the easier it is to reach any given button. With the cross-up, they stuck with 30mm buttons, apparently because they were (probably rightly) concerned with not wanting to deviate too far from what players were used to (basically all arcade cabinets and commercial sticks use 30mm action buttons).
I wanted to experiment with 24mm buttons. I thought there was a pretty decent chance I'd find a 24mm layout to be too small/cramped, but I figured it was worth trying (and folks have been using 24mm buttons on leverless layouts for ages).
To recap, my goals were:
Tailor button locations to my hand size and use case.
Add more buttons in easy to reach spots.
Make the layout as compact as possible while still keeping it comfortable.
Prototyping
My first attempt was a rickety enclosure made out of MDF and some scrap wood. I figured out a layout to try using Adobe Illustrator, printed it out, and then I taped it to a piece of MDF and went to town with a hole saw. Unfortunately, while I snapped a few photos during various points in this process, I wasn’t doing it with a future blog post in mind, so I don’t have the best visual aid here (sorry about that).
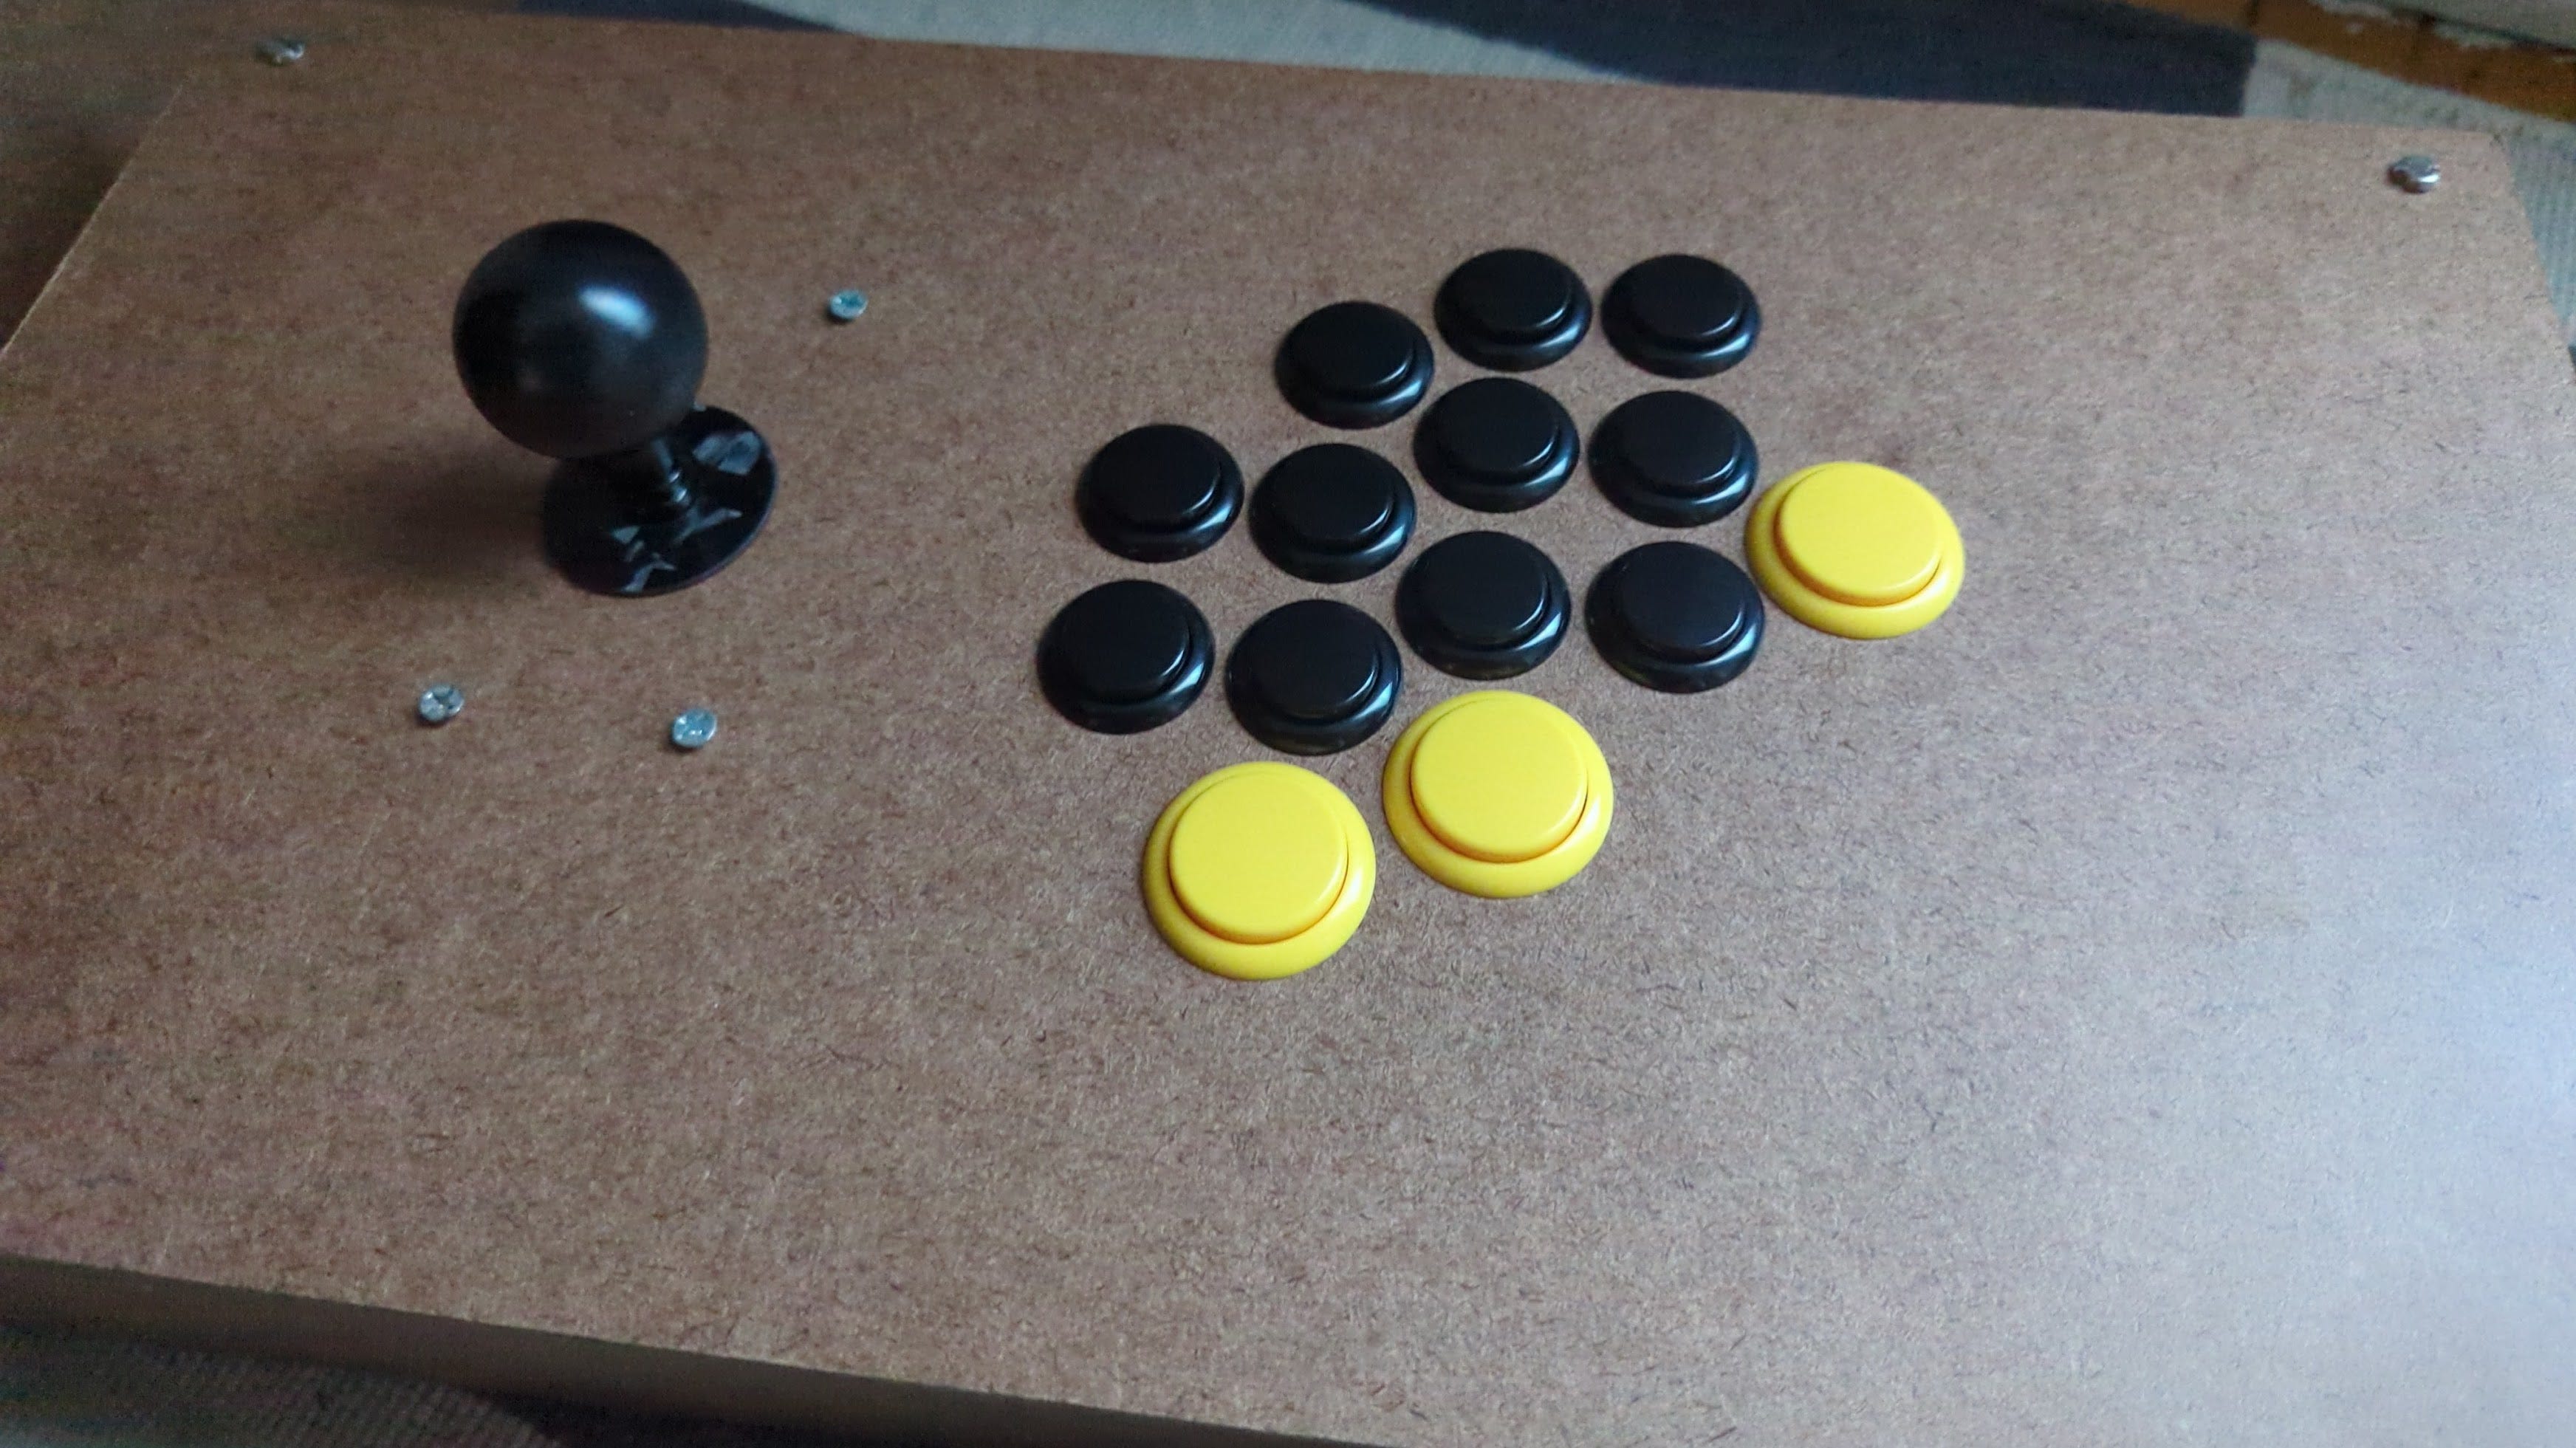
When doing the super early prototyping (the first two or three attempts), I knew within five minutes of trying the layout that there was a bunch of stuff wrong with it, and I immediately needed to make a new panel to fix the issues. This means at this stage, whatever you do, I highly recommend you do it as cheaply and quickly as humanly possible. Find some way to build a box, and cut holes in a panel on top of that box. It doesn’t need to be built to last at this point.
After I got past the major obvious layout issues, I was getting to a point where cutting panels by hand with a hole saw just wasn’t accurate enough—it got to the point where shifting buttons around by a few millimeters in one direction or another was important, so I abandoned the approach.
Laser Cutting and The Standoff Box
My solution to the accurate cuts problem while still keeping things cheap was ordering laser cut hardboard from SendCutSend. You can upload a vector file (I used Illustrator and just used the *.ai file format) and they’ll use it to cut your panels. I just made a top and bottom and then separated the two pieces with metal spacers:


Enclosure cost breakdown:
Top and bottom panels from SendCutSend: ~$38
Standoffs from Aliexpress (I used the 60mm M6 ones here): ~$15 (we need eight of them)
M6 screws from Aliexpress (I got 10mm long ones from here): ~$3 (we need 16 of them)
I play on a lever, so I also needed:
M4 screws from Aliexpress (I got the 16mm long ones here): ~$2 (we need four)
M4 bolts from Aliexpress (I got these) : ~$1
Spacers from SendCutSend to mount the lever: ~$4
So the total cost for all of that ends up being around $65. I don’t think that’s doing too bad! Obviously you can reuse the hardware as you prototype, so each subsequent iteration costs you $30 (since SendCutSend has a $30 minimum). $30 per new layout to test isn’t nothing, but the resulting enclosure was surprisingly sturdy. I had no issues playing on it for weeks and it was rock solid the entire time.
I’ve uploaded the Illustrator files to Google Drive (links at the very bottom of the post) if you want to edit them and try out prototyping like this.
Making the Nice Version
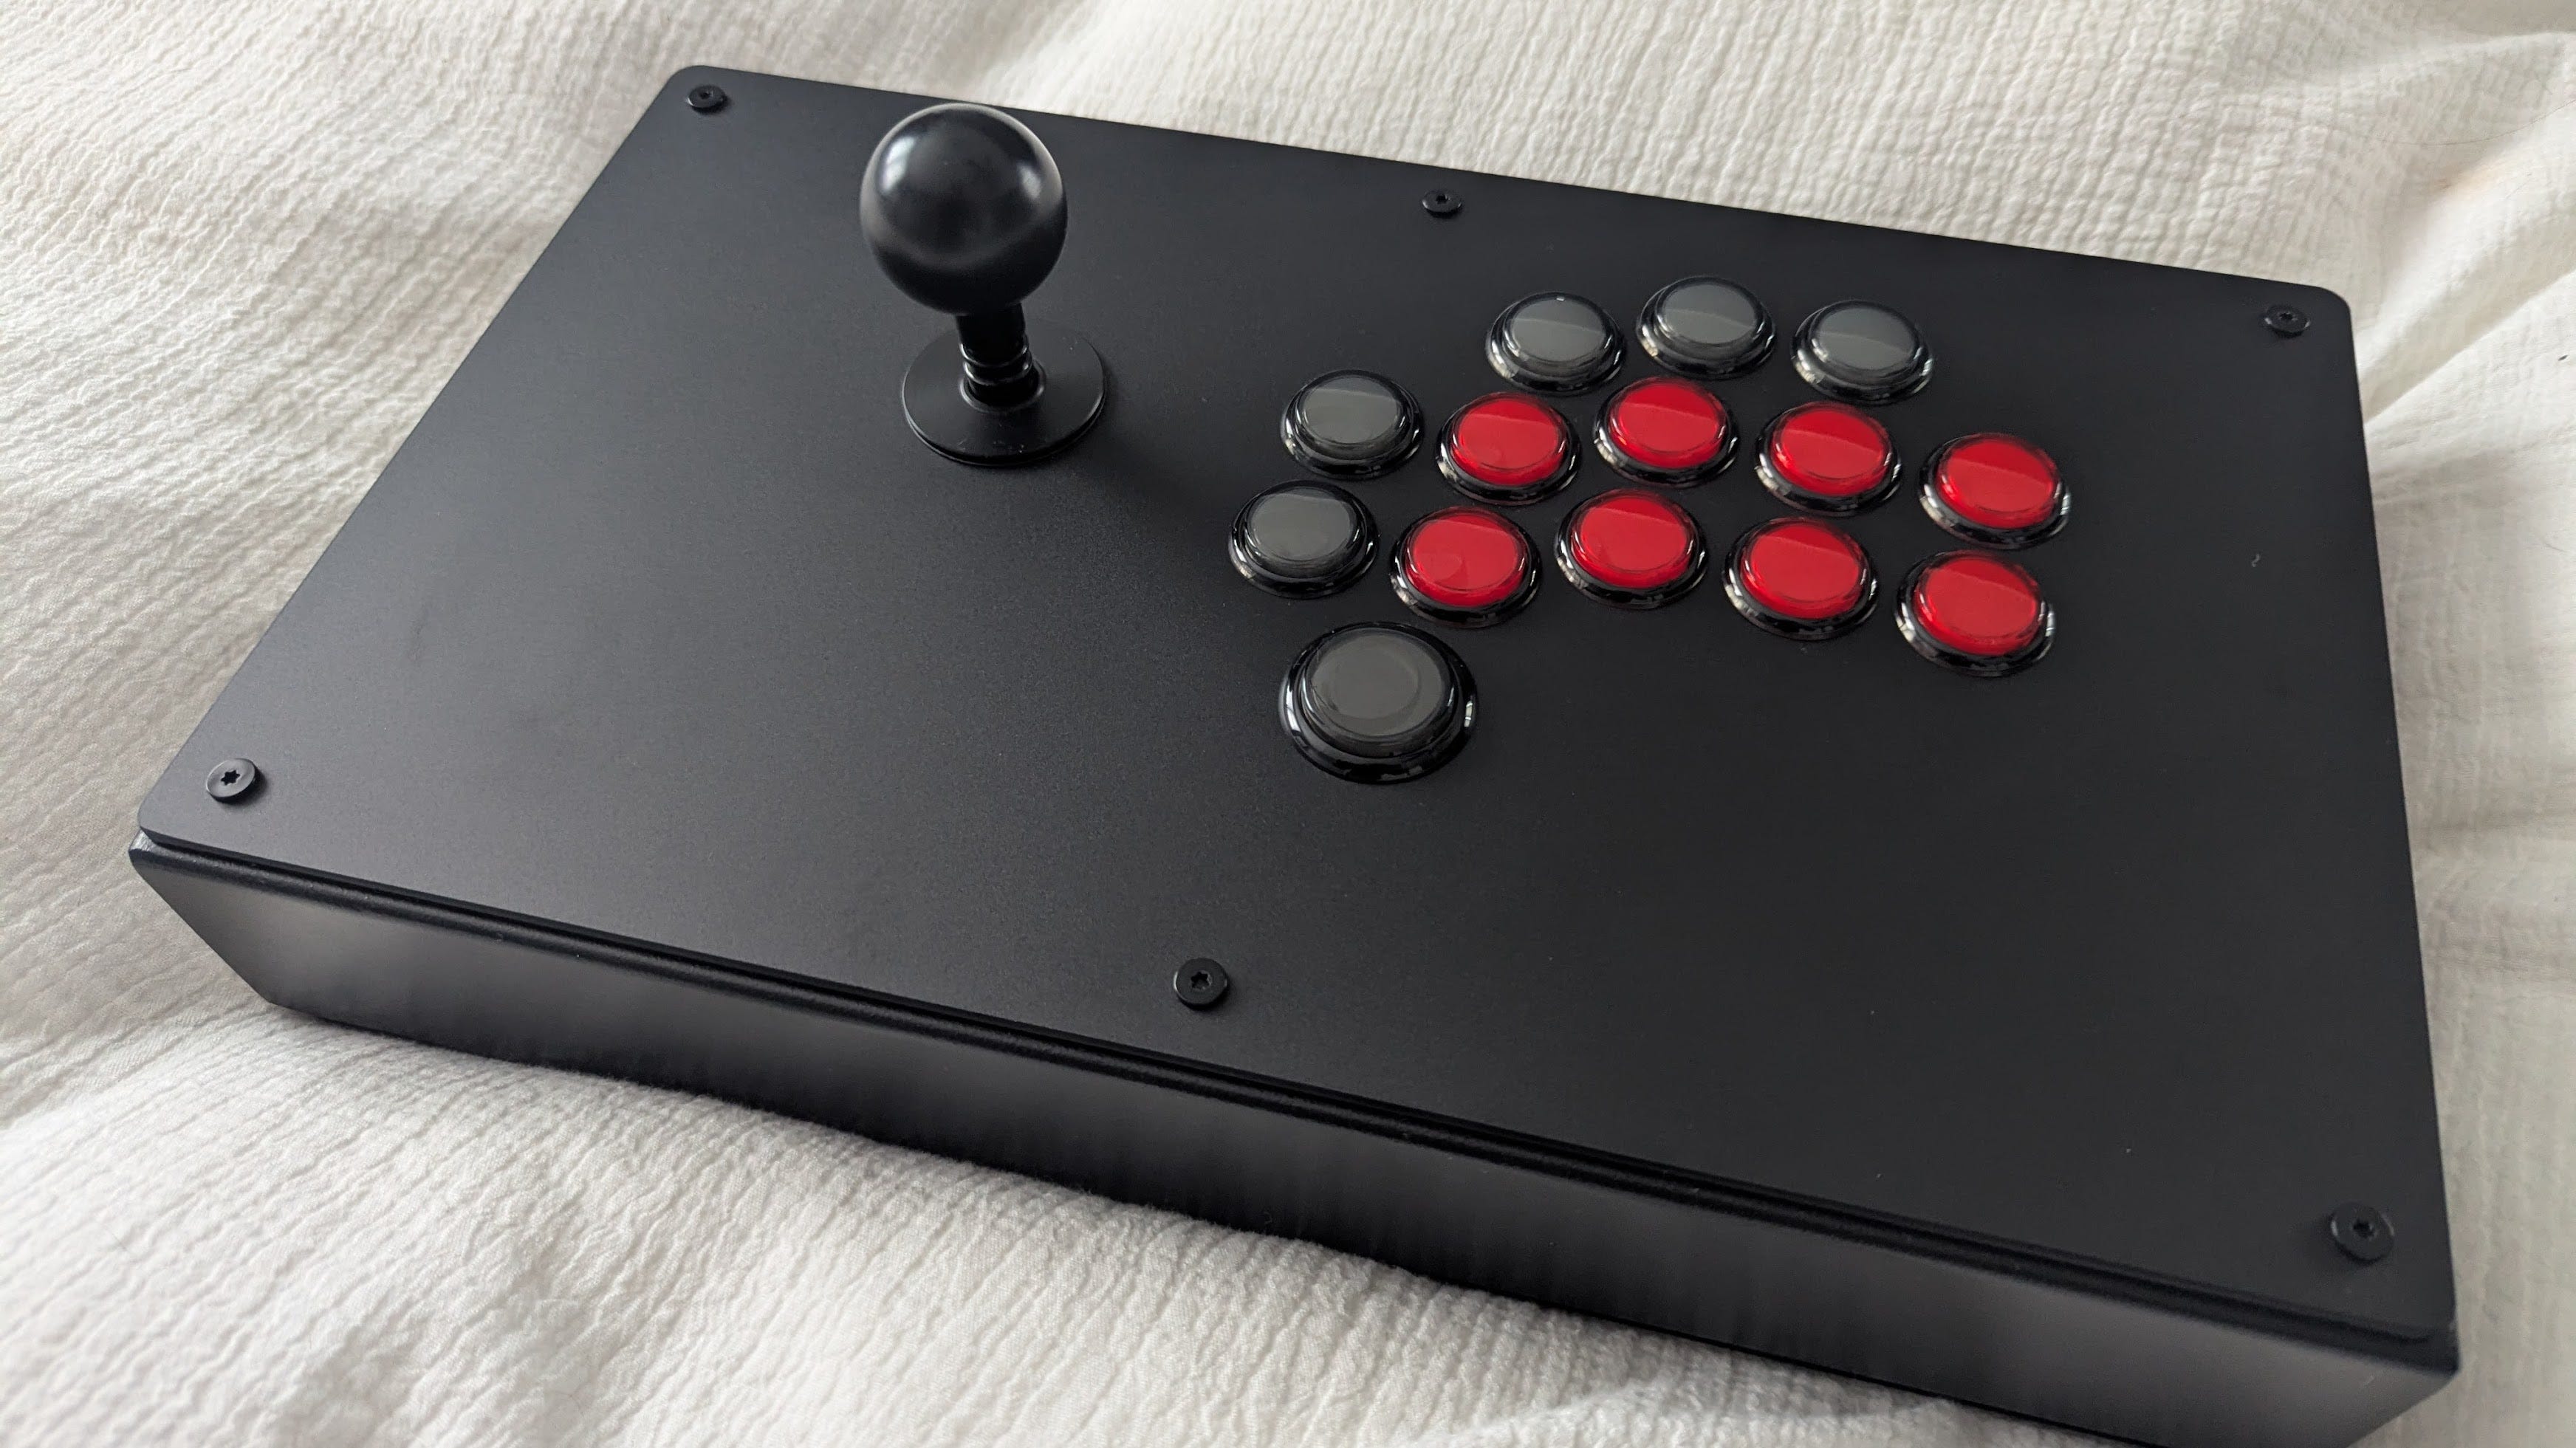
Once I was far enough long that I thought I was an iteration or two from a finalized layout, I bought a 14” modular case from AllFightSticks. I didn’t order a top panel, so this ended up being about $160. I was planning on using this for the final version of my stick that’d I’d play on for years, so I figured I would get the case, and then zero in on my final layout with custom panels from SendCutSend. I tried three more layouts in different materials before finalizing it.
After I was certain I was happy with the layout, I ordered a matte acrylic panel from AllFightSticks just because I liked the look/feel of it (though I would’ve been fine playing on the SendCutSend panel forever). Here’s the final product:
Random Advice
Here’s a random list of stuff that I wasn’t sure what to do with:
Make sure your button spacing isn’t too close! Different buttons have slightly different diameters. I found that making sure buttons were at least 5mm apart meant that most buttons would fit fine. If you want the most compact layout possible, Sanwa OBSF and Qanba Gravity KS buttons have smaller diameters to accommodate this. Others, like Punk Workshop or Hori Hayabusa buttons are larger, so if you want to use those, measure carefully.
Make sure your button hole sizes and screw holes are correct.
Before placing a SendCutSend order, print out the layout at home. See what it looks like on paper and avoid wasting money if there are big/obvious mistakes.
If you’re doing the standoff box method, don’t forget spacers so that the lever is recessed below the panel and sits at the right height.
Final Thoughts
You’re going to have to prototype a lot, so find a way to do it cheaply (but still accurately), especially after you progress past your initial terrible designs)
If you’re deep into fighting games and have the interest, time, and money to do this, I think designing your own layout is absolutely worth it. If you’re going to spend three or four or five hundred dollars on a custom stick, it seems weird to default to a Vewlix or Sega 2P layout without even questioning it and actually knowing it’s the layout for you.
Files and Resources
Standoff Box
These are the files I sent to SendCutSend to prototype button layouts. I sandwiched 60mm standoffs between the top and bottom panels which allowed enough room for wiring/buttons (50mm would likely work as well, but I did not test this). The lever spacing plate is needed to recess the lever beneath the top panel so that it sits at the correct height (I used two of them). The panels I ordered were all 0.125" hardboard.
Hardware:
10mm M6 screws x16 (to attach the top and button panels to the standoffs)
16mm M4 screws x4 (to attach the lever)
M4 bolts x4 (again, if you're using a lever)