

Roughly a year ago, a video dropped outlining the mechanics of Tōkon as they existed at that time. No one had really had a chance to play the game yet, but based on the video, I tried to work through the controls, the user interface, and the mechanics of the game.
Since that post, they’ve made some changes to the controls/mechanics. Additionally, there’s an open beta this weekend (July 24-26), and unlike the past closed betas which were PS5-only, this one is also on PC, so I was finally able to try the game. In this post, I’ll go over:
The control scheme (and my recommended control scheme for stick/leverless)
The user interface
The mechanics
Other random thoughts
There will be some repeat stuff here from the previous post, since I want this post to be its own self-contained thing. Let’s get to it.
Note: I’ll be using numpad notation.
The Control Scheme
When I’m trying to wrap my head around any new fighting game, the first thing I want to know is what buttons exist—I think there’s no better way to start understanding the game. I’m going to talk through my thought process, and then I’ll have my recommended control scheme (for stick/leverless at least) at the end of this section.
Tōkon has a million buttons:
Light Attack (L)
Medium Attack (M)
Heavy Attack (H)
Assemble (A): Your assist button
Tag (T): Your button to tag in teammates
Unique Attack (U): Similar to the drive button in Blazblue or the stand button in JoJo’s Bizarre Adventure (your “do your character’s unique mechanic” button)
Quick Skill (QS): A button for one-button special moves
Quick Assemble (QA): Does a variety of different team actions—we’ll talk about this one later since it doesn’t have a good point of comparison from a past fighting game that we can use
Quick Dash (QD): Dash button
One reason I start with the control scheme is because one of my earliest goals is figuring out what my button layout will be. Part of that question is how many of these buttons are actually necessary. L, M, H, Assemble, Tag, and Unique Attack are the core six buttons for this game, and they’ll be needed no matter what, so at minimum, this is a six button game.
You technically don’t need any of the “Quick” buttons, but let’s look at them one by one.
Quick Skill
You can do all of your specials with motion inputs, and generally you probably want to—they do a bit more damage when performed that way. Generally, the main consideration of the importance of one-button specials is whether invincible reversals (done to beat an opponent’s actions on reaction) matter in a game. Based on my limited experience in the beta, this doesn’t seem to really be the case. The dragon punch style specials don’t have full invulnerability (just special anti-air invulnerability). They might still matter sometimes, but 2H is already a one-button universal move with anti-air invulnerability (that leads to a combo!)
Characters’ level 1 supers seem all have proper invul frames, but their motion inputs are just 236H, so the benefit of a one-button input is a lot less significant than it might be if the motion input was a double quarter circle or a 720 or something. However, there are a lot of 22 inputs for specials, which I personally dislike (I play on stick), and Quick Skill lets me do those in a quicker, less telegraphed way. While I think the utility of the Quick Skill button is a bit marginal, I do think it’ll be necessary to play the game at 100%.
Verdict: Necessary-ish
Quick Assemble
All the functions of a dedicated Quick Assemble button can be done by pressing L+A at the same time. I don’t see any real benefit of having this button if you’re playing on a device where it’s easy to press L+A.
Verdict: Not needed
Quick Dash
When the original beginner’s guide video dropped, I thought Quick Dash would be necessary, since best I could tell, the only alternative was double tapping directions to dash (which sucks). I’m not sure whether it was added later or if we just didn’t know about it at the time, but you can dash by pressing L+M, so as long as your device allows you easy access to pressing those two buttons at the same time, you can safely ignore this macro.
Verdict: Not needed
Recommended Control Scheme (Stick/Leverless)
Assuming you agree with my breakdown so far, that leaves us with seven necessary buttons:
Light Attack (L)
Medium Attack (M)
Heavy Attack (H)
Assemble (A)
Tag (T)
Unique Attack (U)
Quick Skill (QS)
When I’m figuring out my button layout for a game, I try to stick as close as I can to other similar games I’ve played, but I also want to accommodate the inputs that the new game requires. For button combination accessibility, we’ll need to be able to press:
L+A: For all the Quick Assemble functions
L+M: Dash
M+H: Throw
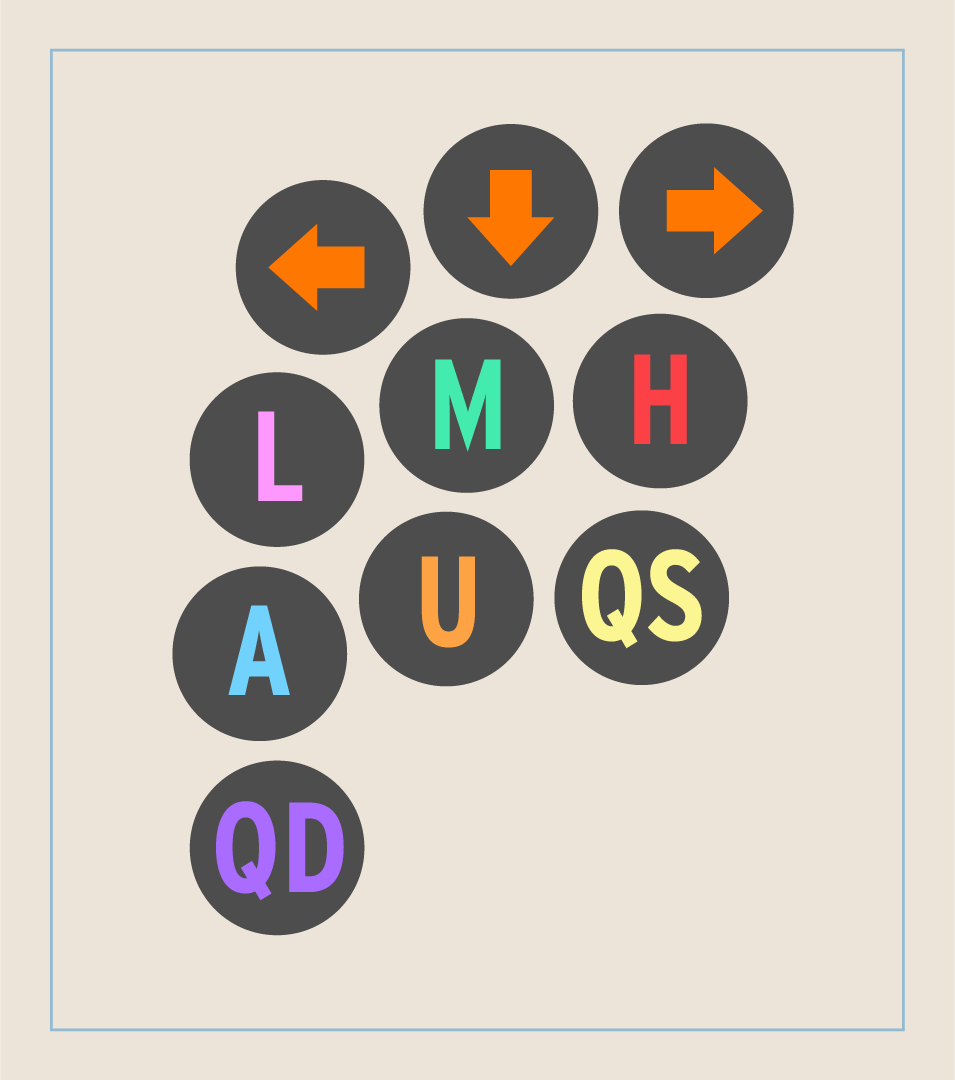
I have a stick with a million buttons (to accommodate the button bloat of modern fighting games), so I’m personally going with:
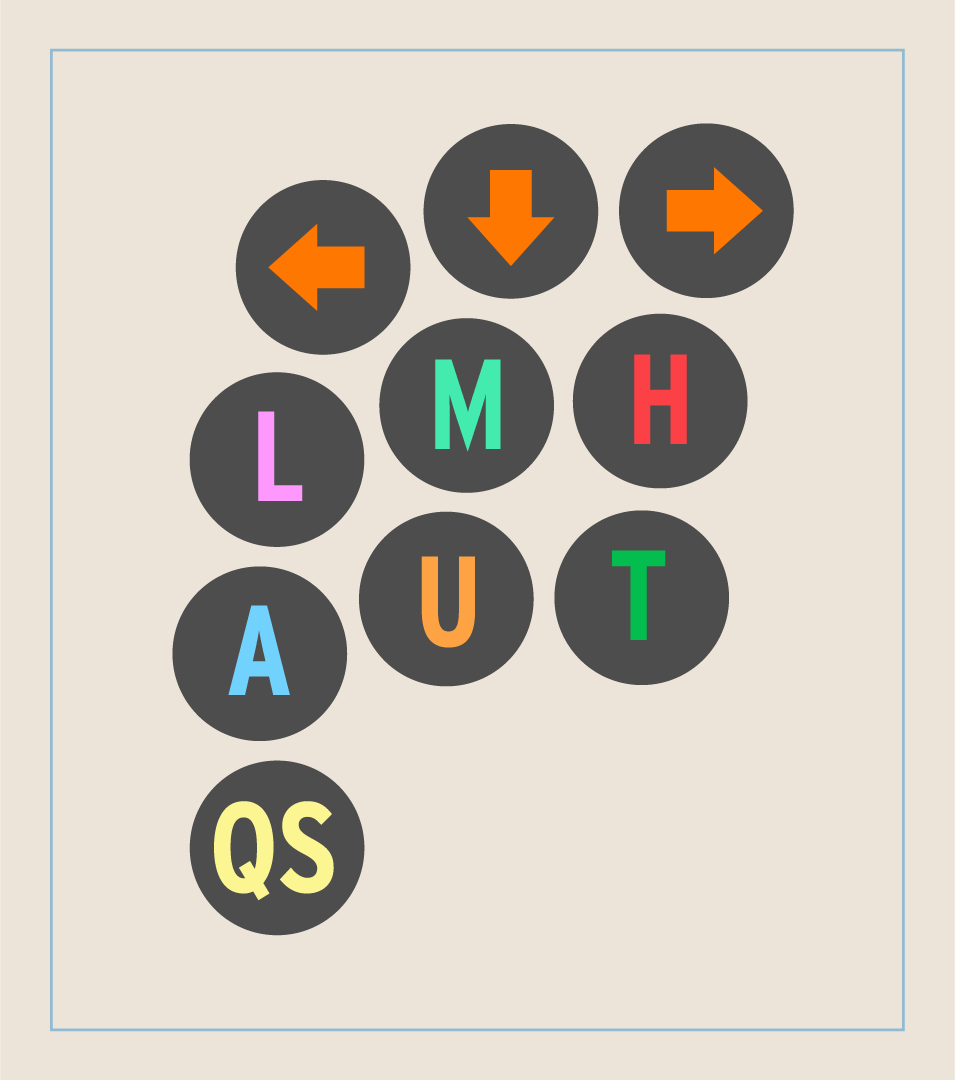
I added the additional directionals above the main action buttons, since to call your first/second/third assist or tag in your first/second/third character, you need to do a back/down/forward input plus the assist or tag button, and I like being able to do that independently of my lever.
For a standard eight button stick button layout, I’d recommend something like:
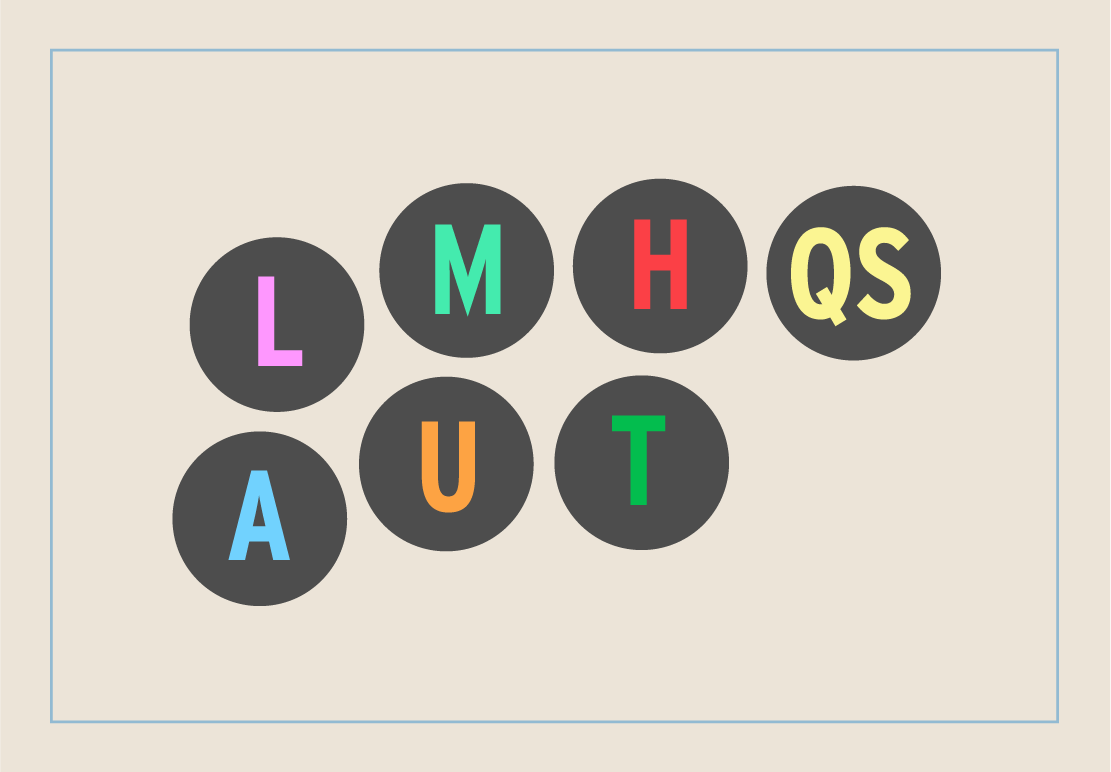
Tag and Quick Skill will probably be the two most infrequently used buttons, so swapping the two might work better for you (it’s down to personal preference).
User Interface
After looking at the controls, the next thing I look at when trying to understand a new game is the UI during a match. If the developer thinks something is important enough to represent it graphically on screen at all times, it’s probably important to know what it is.
Shared Life Bar
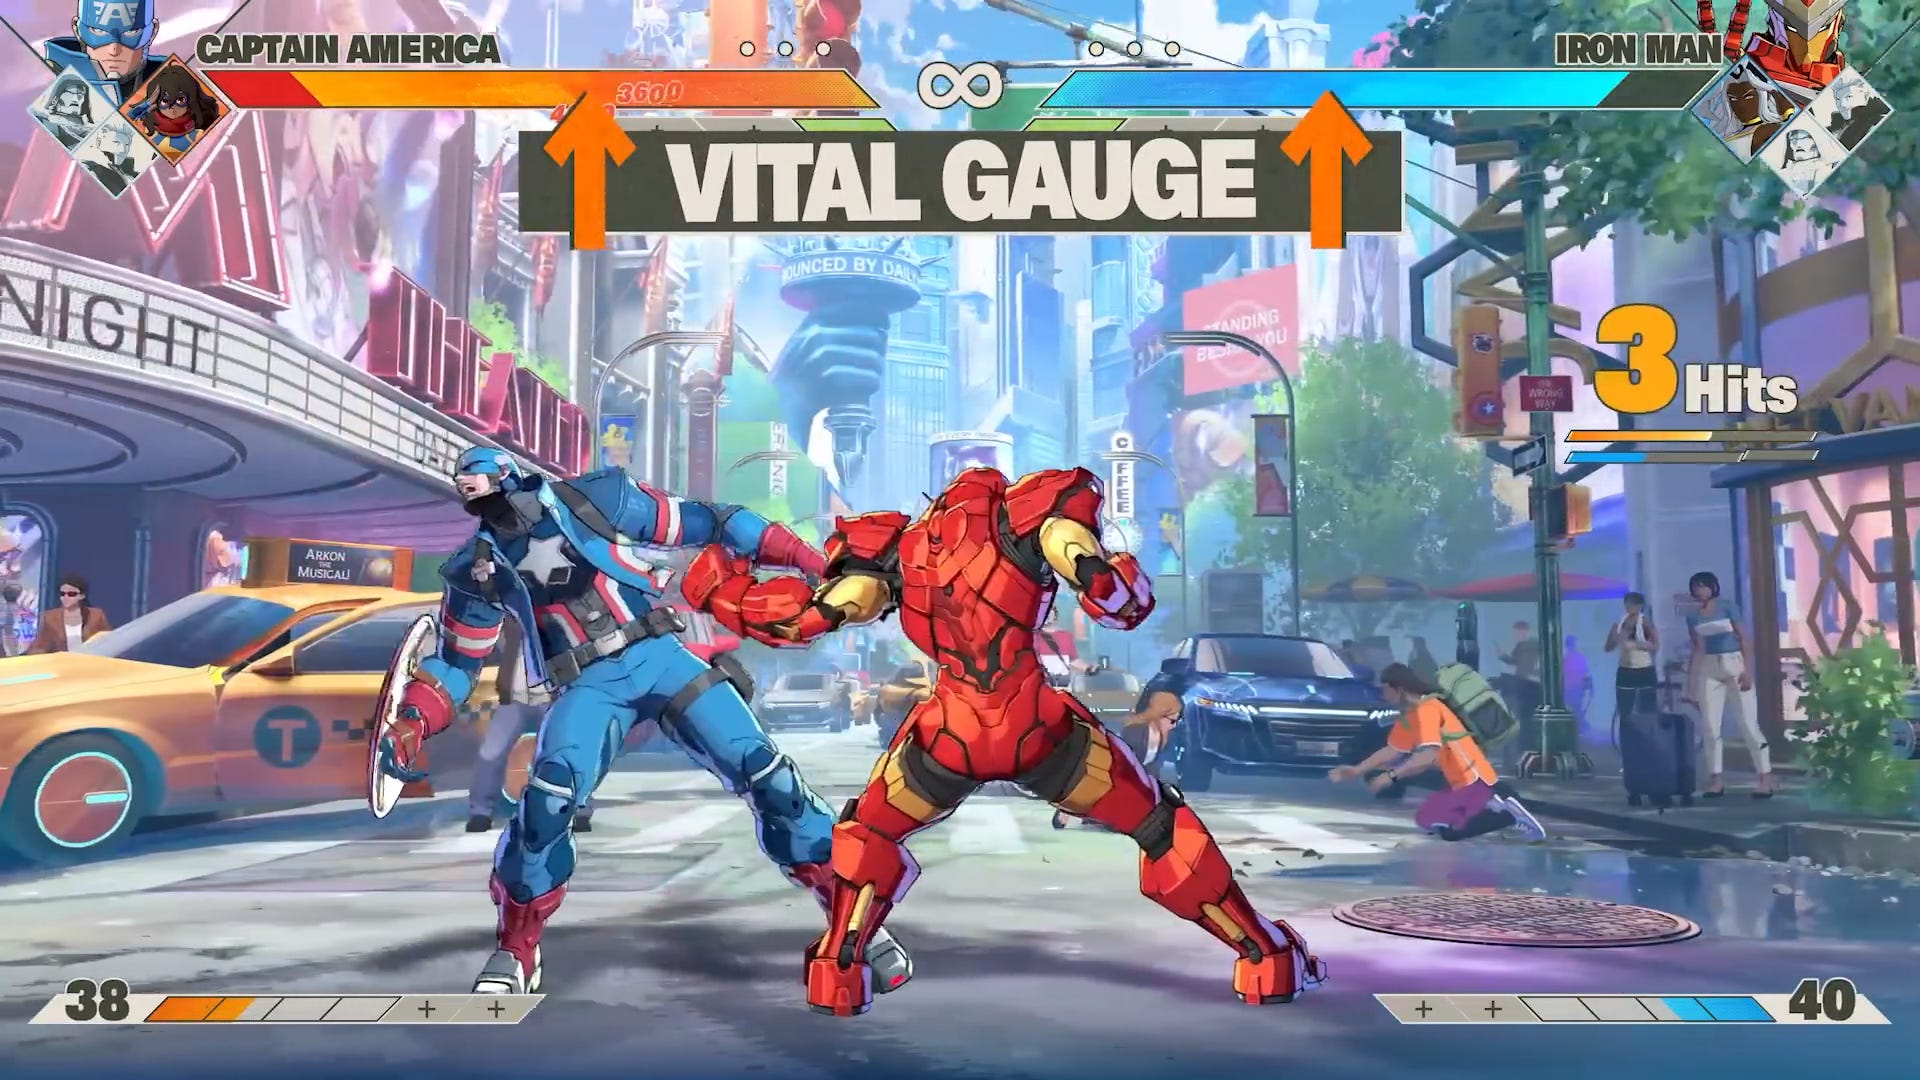
Rather than individual characters having their own life bars (and being able to be knocked out individually), your team has a collective life bar. This helps avoid slippery slope situations like I talked about in a recent video, but it also means if the opposing team has an assist that’s hard to deal with, you can’t ever kill that assist character—you just have to deal with that assist forever. That being said, hitting the assist does do (recoverable) damage to the collective life bar, so you can still punish opponents for poor assist calls.
Special moves do chip damage in the form of recoverable damage (after not getting hit or blocking anything for a bit, the grey health will slowly recover). You cannot die from chip damage.
Character Portraits
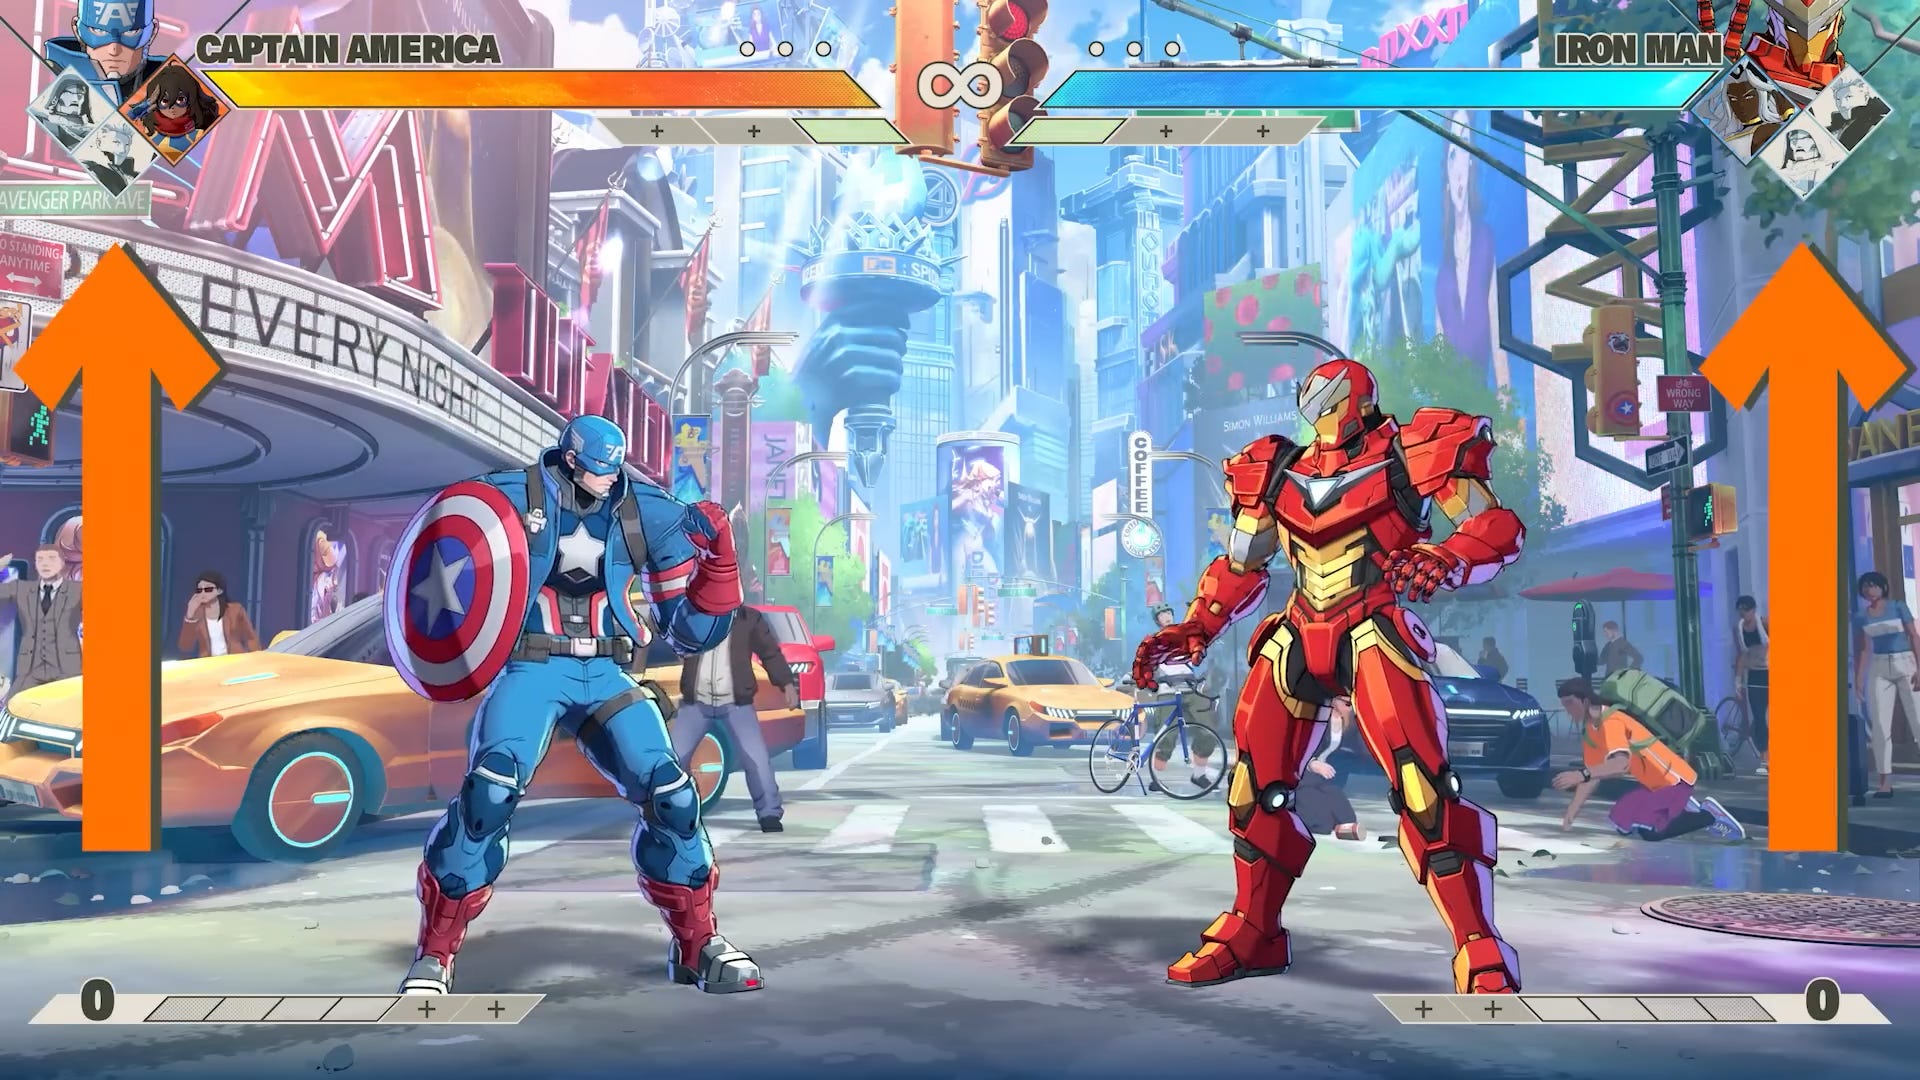
Next to your health gauge, you have the four portraits of the characters each player picked for their team. When the match starts, you only have access to two of your characters (the first two you picked on the character select screen) while the other two are greyed out. The character closest to your life bar is assist 1, the bottom character is assist 2, and then the character closest to the edge of the screen is assist 3, for for player one in the screenshot above, the team order is Captain America > Ms. Marvel > Star-Lord > Doctor Doom.
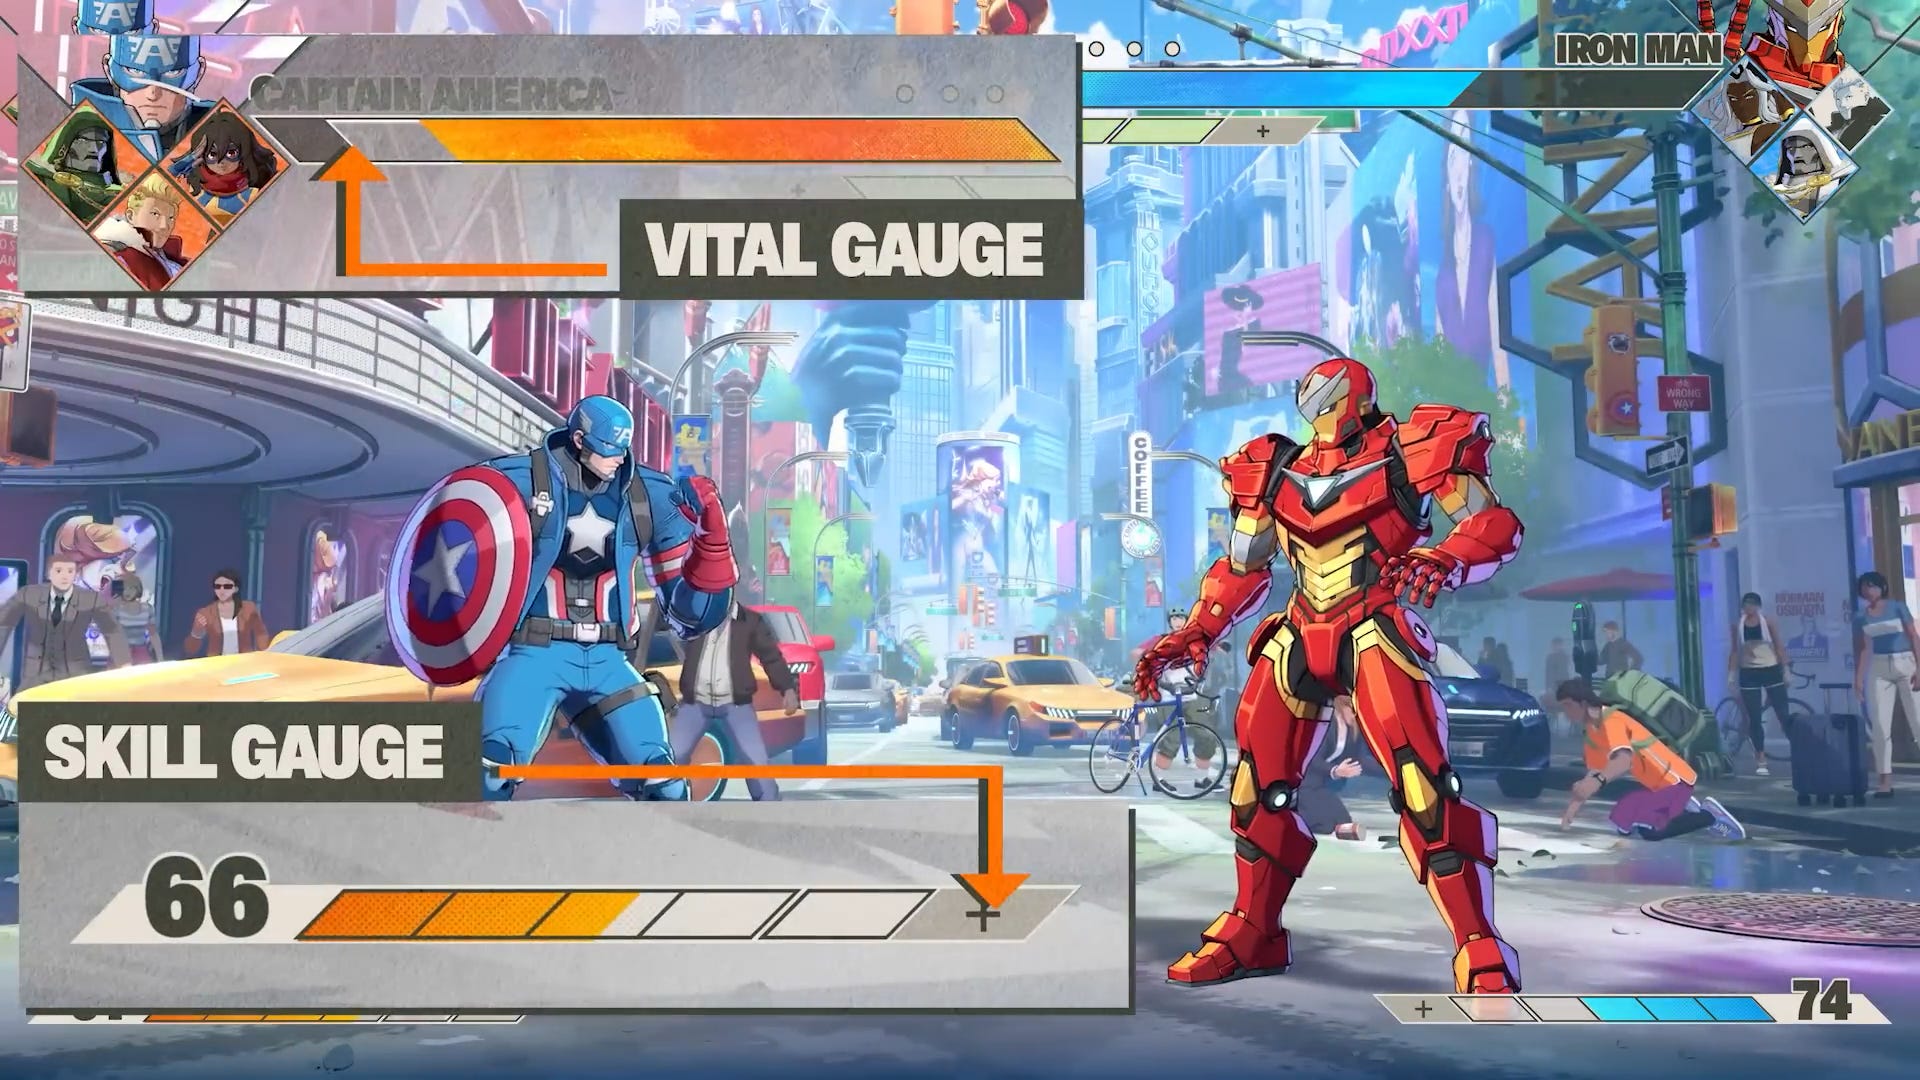
When you meet certain conditions, you unlock your third and fourth characters, giving you access to their help via the game’s different team/tag mechanics that we’ll talk about later. Unlocking additional characters also increases your total health and maximum possible super meter:
Round Counter
Versus games traditionally don’t have rounds like you see in most 1v1 fighting games. Tōkon differs from them and has a best of five round format. After losing a round, you unlock your next character for the remainder of the match (if you have yet to unlock all of your characters).
Also in versus games, the losing player will generally have access to fewer and fewer mechanics as the match goes on (since they are losing characters). Tōkon flips that on its head, and instead has the winning player gain access to more and more mechanics as the match continues. In some ways this is functionally the same. Whether it’s the winning player becoming more powerful or the losing player becoming less powerful, you’re still creating a slippery slope situation. It differs in that:
The losing player will still eventually unlock all their characters, so the advantage given to the winning player is temporary and;
You can never have less than two characters, so you will always have access to team mechanics (unlike a traditional versus game where you lose access to team mechanics completely when you’re down to your final character).
There’s also the psychological phenomenon called loss aversion—the pain of me giving you $20 and then taking it away feels worse than me just not giving you $20 in the first place. Giving the winning player more stuff will feel better than taking away the losing player’s stuff.
Assemble Gauge
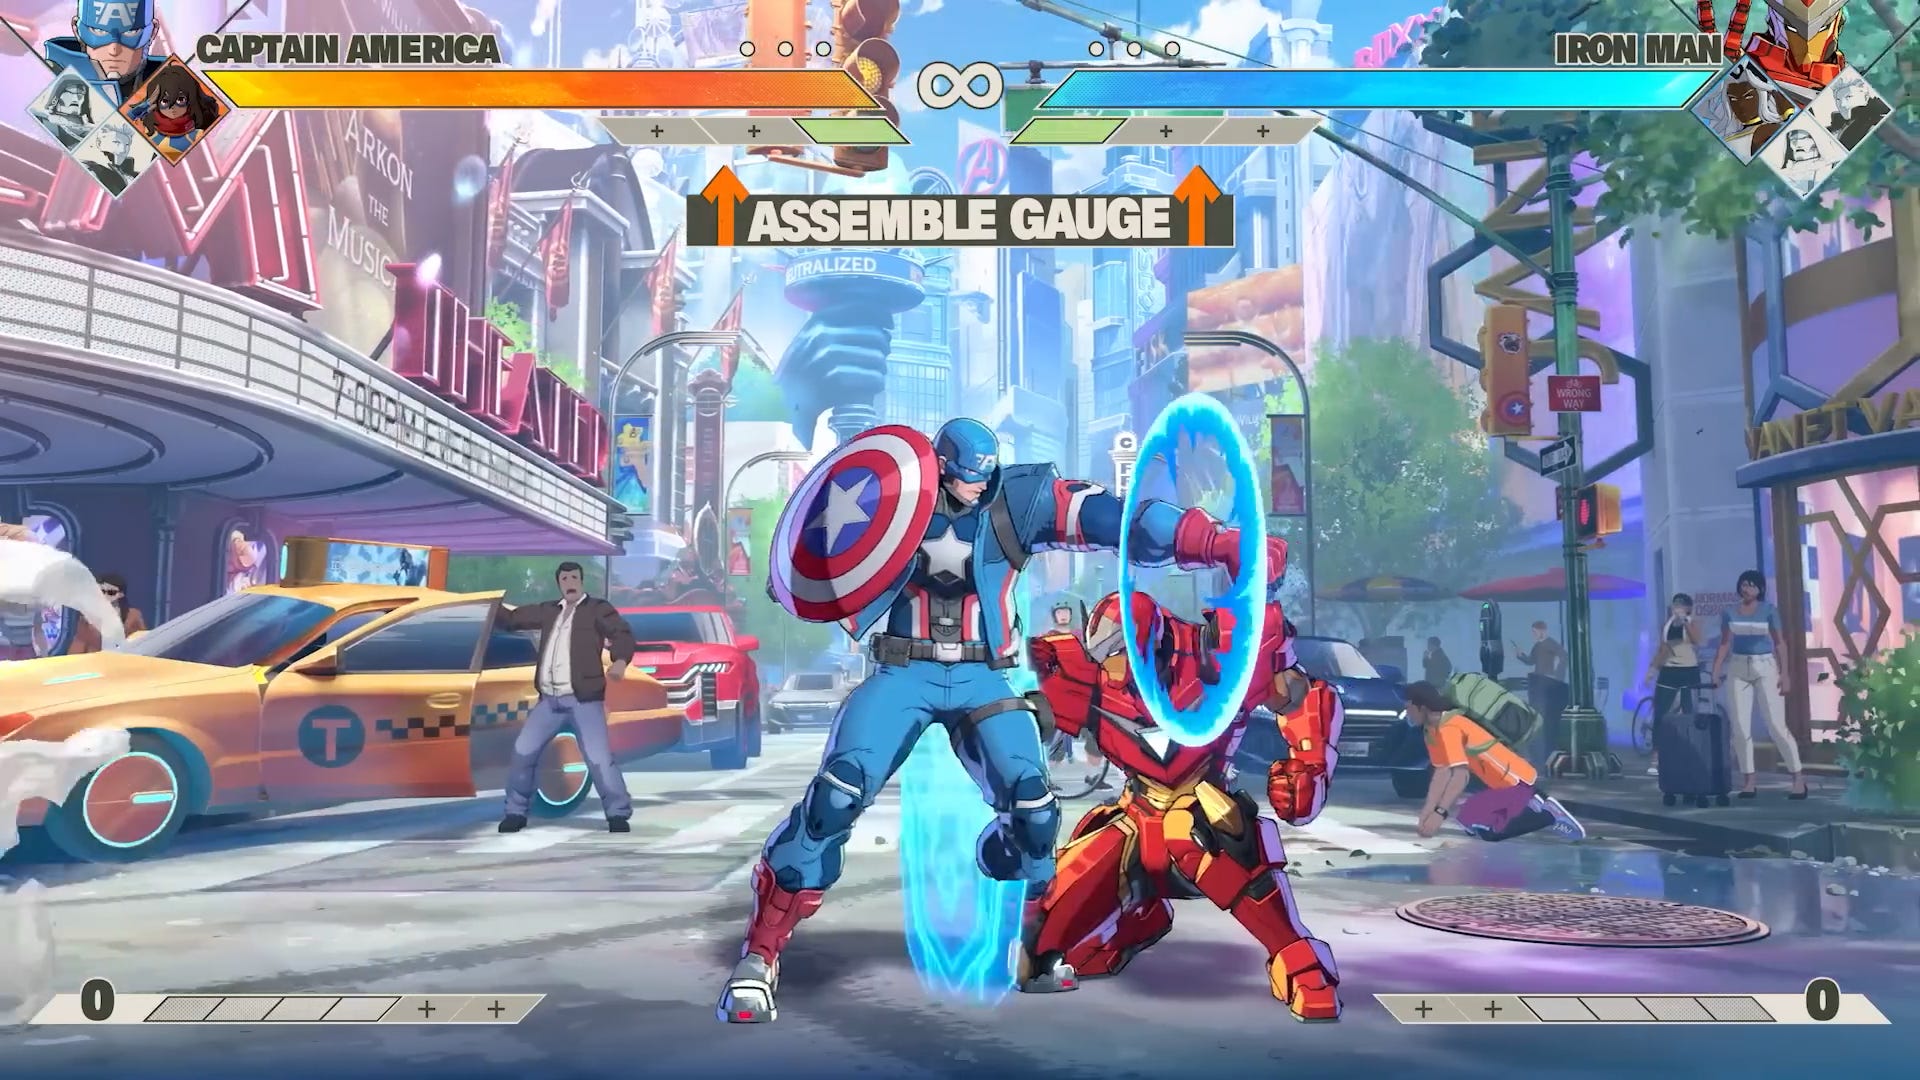
It’s a bar with three chunks underneath your health gauge that’s used for certain team mechanics. This recovers slowly over time (roughly 7 seconds per chunk). The number of chunks available is based on how many teammates you’ve unlocked.
Skill Gauge
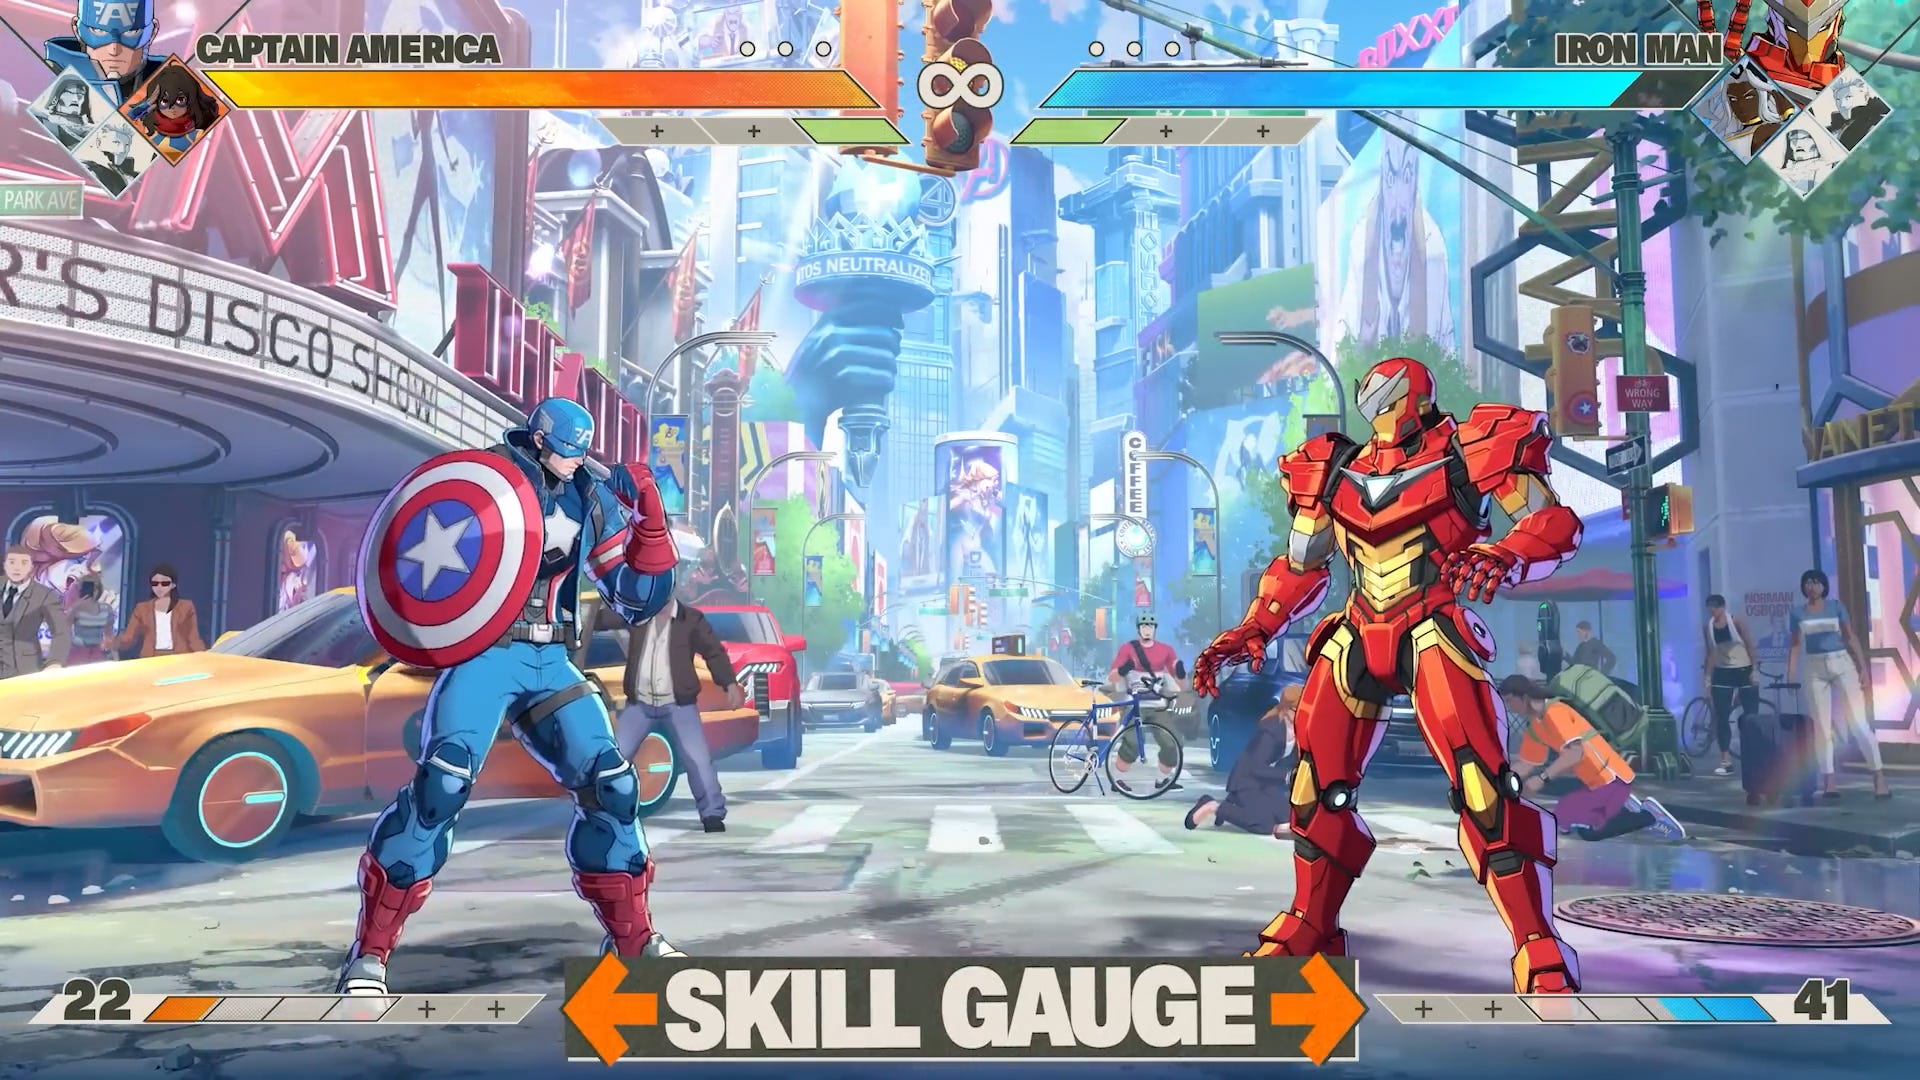
You spend this to do supers and EX moves. You do not gain meter for whiffed moves (even specials). We’ll need more time to figure out how meter build works, but projectiles seems to give roughly twice as much meter to the character getting hit as they do to the character firing the projectile, so a character getting zoned out will be getting a ton of meter (presumably to give them more tools to overcome the zoning). The opposite is true for melee attacks, where the attacker gets twice the meter that the defender gets (when the attacks hit). If melee attacks are blocked, both characters get the same amount of meter.
Basic Mechanics
Movement
Most characters share the universal movement options of:
Walk (4 or 6 on the ground)
Ground Dash (44/66, or 4/6 plus L+M or Quick Dash if you’re using the macro)
You can hold forward or the dash button(s) to keep running forward
Jump (7/8/9)
Super jump (1/2/3 > 7/8/9)
Double jump (7/8/9 in the air)
Air dash (same as ground dash inputs but in the air)
You can either double jump or air dash once per jump (or super jump). You cannot both double jump and air dash during a single jump.
Basic Attacks
Light, medium and heavy attacks seem like they work exactly like they do in Dragonball FighterZ, down to each button having its own auto combo and 2H being a universal launcher/anti-air button.
Basic attacks can chain together, generally going from lighter strength buttons to heavier strength buttons. Best I can tell, you can only ever do four buttons in a chain. So while you could do 5L > 2M > 5M > 5H, or you could do 2M > 5M > 5H > 2H, you cannot do 5L > 2M > 5M > 5H > 2H.
Throw
Throws do pretty solid damage on their own. If you do throw point blank, the startup is 5F (pretty damn fast!) If you perform a throw from outside of point blank range, your character will dash forward and then do the throw once they’re next to the opponent. As you’d expect, this significantly increases the startup of the throw.
You can also cancel 5L or 2L into throw. I’m not sure if this actually makes the throw slower or if the throw itself just can’t happen until the opposing character exits hit/block stun, but this is significantly easier to see coming than raw throw and is likely reactable.
Unlocking Characters
You unlock your next character by:
Losing a round
Causing a wall break with certain actions at or near a breakable wall such as:
Starting a combo with 2H and doing j.6H during your air combo afterward
Doing a normal throw
Hitting character-specific moves like doing Storm’s command grab while wind is active
Wall splatting someone (if at the edge of a stage so a wall break/stage transition is not possible)
Tag and Assists (“Assemble”)
You can raw tag in another member of your team by pressing T plus a direction. You tag in:
Character 1 with 5T or 6T (8T/9T also works)
Character 2 with 2T (or 1T/3T; as long as you’re pressing any version of down, you get character 2),
Character 3 with 4T (7T also works)
Raw tag has 25F of recovery, so you can get punished for doing it recklessly.
Like other versus games, you can call in your off-screen characters to help while still controlling your point character. Tōkon handles this a bit differently than we’ve seen in the past. There’s just one assist button (they call it “Assemble,” but I’m going to talk like a human here and just call them assists). You choose the assist you call by pressing a direction plus A. The direction stuff is the same as how it works with tags:
Assist 1 with 5A or 6A (8A/9A also works)
Assist 2 with 2A (or 1A/3A; as long as you’re pressing any version of down, you get assist 2),
Assist 3 with 4A (7A also works)
Input-wise, I don’t love this, for the same reason that I don’t like needing directionals for assists in 2XKO. It makes it impossible to do things like block while calling assist 1. This is why I’m considering adding directional buttons to my control layout so that I can call the assist I want more easily:
Calling your assists in neutral doesn’t cost any resource, but the assist character gets put on a short cooldown. It’s important to note, that unlike many other games with assists, you cannot call an assist in neutral while doing a move with your point character. For example, if you whiff 5H with your point character and attempt to call an assist while the 5H is still out there, nothing will happen.
Like older versus games (but unlike Dragonball FighterZ), assists do not go away when you hit the point character.
Tōkon is also doing a few odd/new things with assists. First, the assist a character does is dictated by their character slot. The character in assist slot 1 will do a projectile assist. If that same character gets swapped to assist slot 2, they’ll do an anti-air whenever you call them as an assist. If they end up in slot 3, they do a unique character-specific assist. This might not be as hard to keep track of as it first seems. Assist 1 will always be a projectile (or something projectile-esque), and assist 2 will always be a vertical/anti-air assist. However, it does seem like this might just homogenize the cast and make team comp boring, since each character’s assists might be largely interchangeable (outside of the slot 3 character-specific assist). If projectile/anti-air assists do differ a lot from character to character though, that homogeneity could be mitigated.
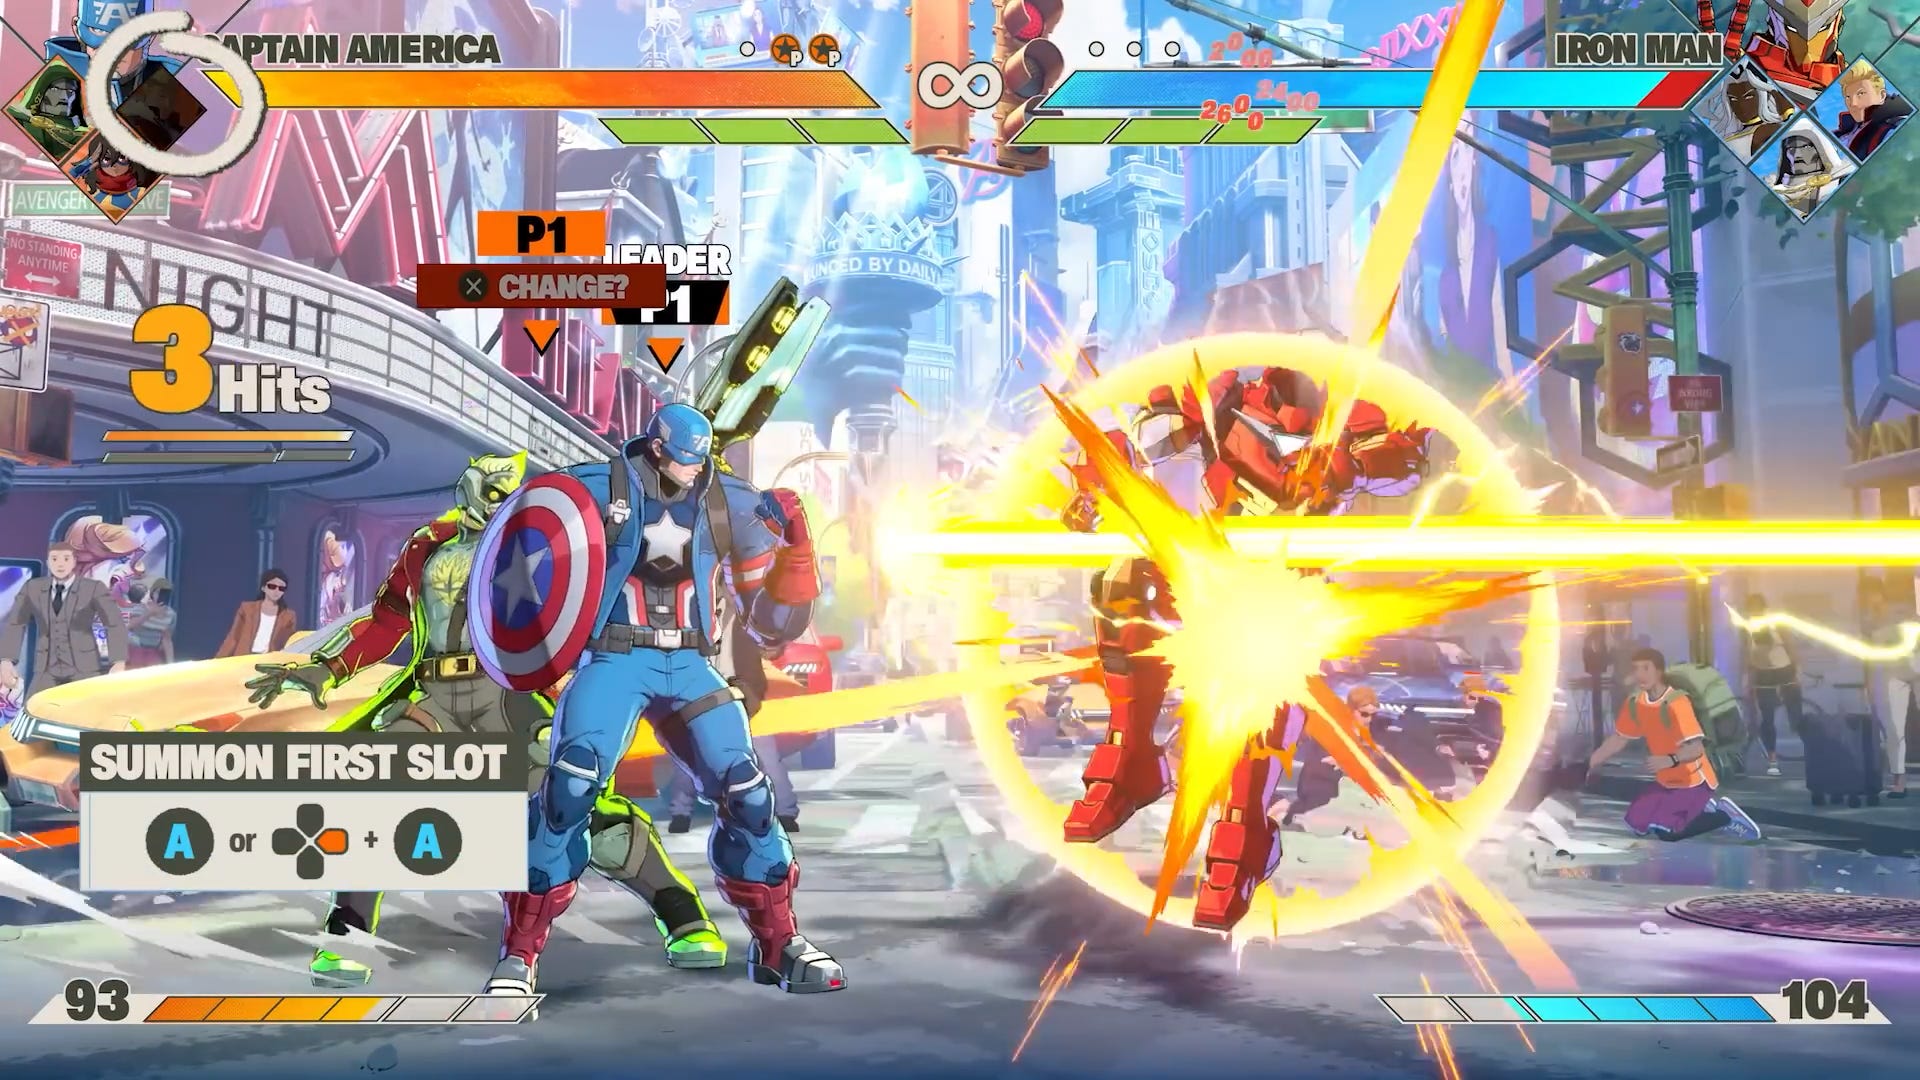
Second, you can get a different assist entirely if you call your first assist character while your opponent is in hit stun/block stun. If you press A without any direction you get the unique assist, but you can still choose to get your normal assist 1 by pressing 6A instead of 5A. Either way, calling an assist while your opponent is in hit stun or block stun costs a chunk of assemble gauge, presumably to prevent infinite combos and indefinite pressure sequences.
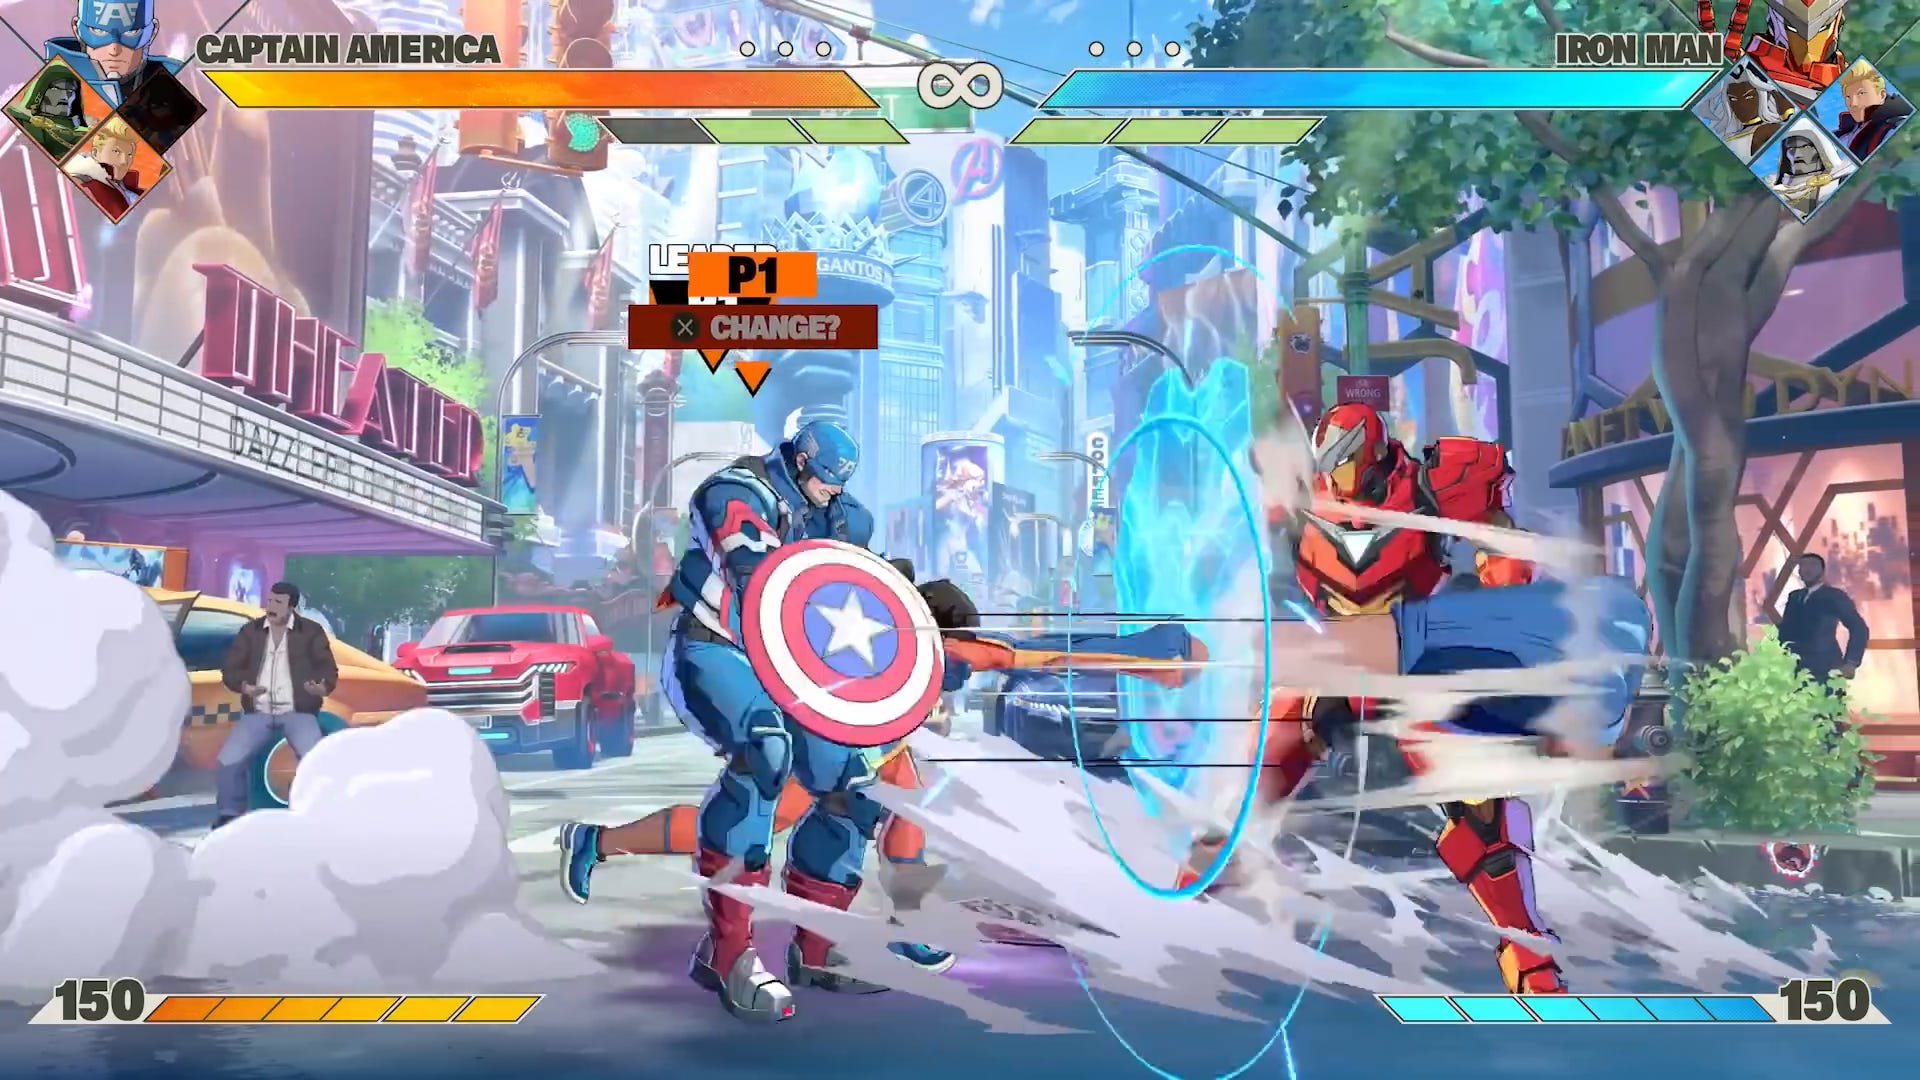
Third, calling an assist while you’re above a certain altitude does an aerial version of the assist. At or below normal jump height, you’ll get the grounded version, but at double jump or super jump height, you’ll get the air version.
You can also swap to playing your assist character by hitting the Tag button after their attack (you’ll see a switch icon above their head when you’re allowed to do this). This seems a bit more restrained than you see in the active tag systems in games like Marvel vs. Capcom: Infinite or 2XKO. I’m a fan of this approach since active tag in those other games can sometimes turn into feeling like you’re forced to play two characters simultaneously for a lot of the match, and it can also make things visually really hard to keep track of.
Special Moves, EX Special Moves and Supers (“Skills”, “EX Skills”, and “Super Skills”)
Again, I’m going to stick with human language and just call these specials, EX specials, and supers. They aren’t really doing anything new or crazy here.
Specials can be done with motion inputs or with the Quick Skill button. Like we talked about earlier, I think there will be times where either the motion version or the one-button version will be best, so you’ll want to have both in your arsenal (see: Granblue Fantasy Versus).
EX specials cost one chunk of super meter (25 meter) and allow you to do a powered up version of that special (similar to how they handled EX moves in Dragonball FighterZ).
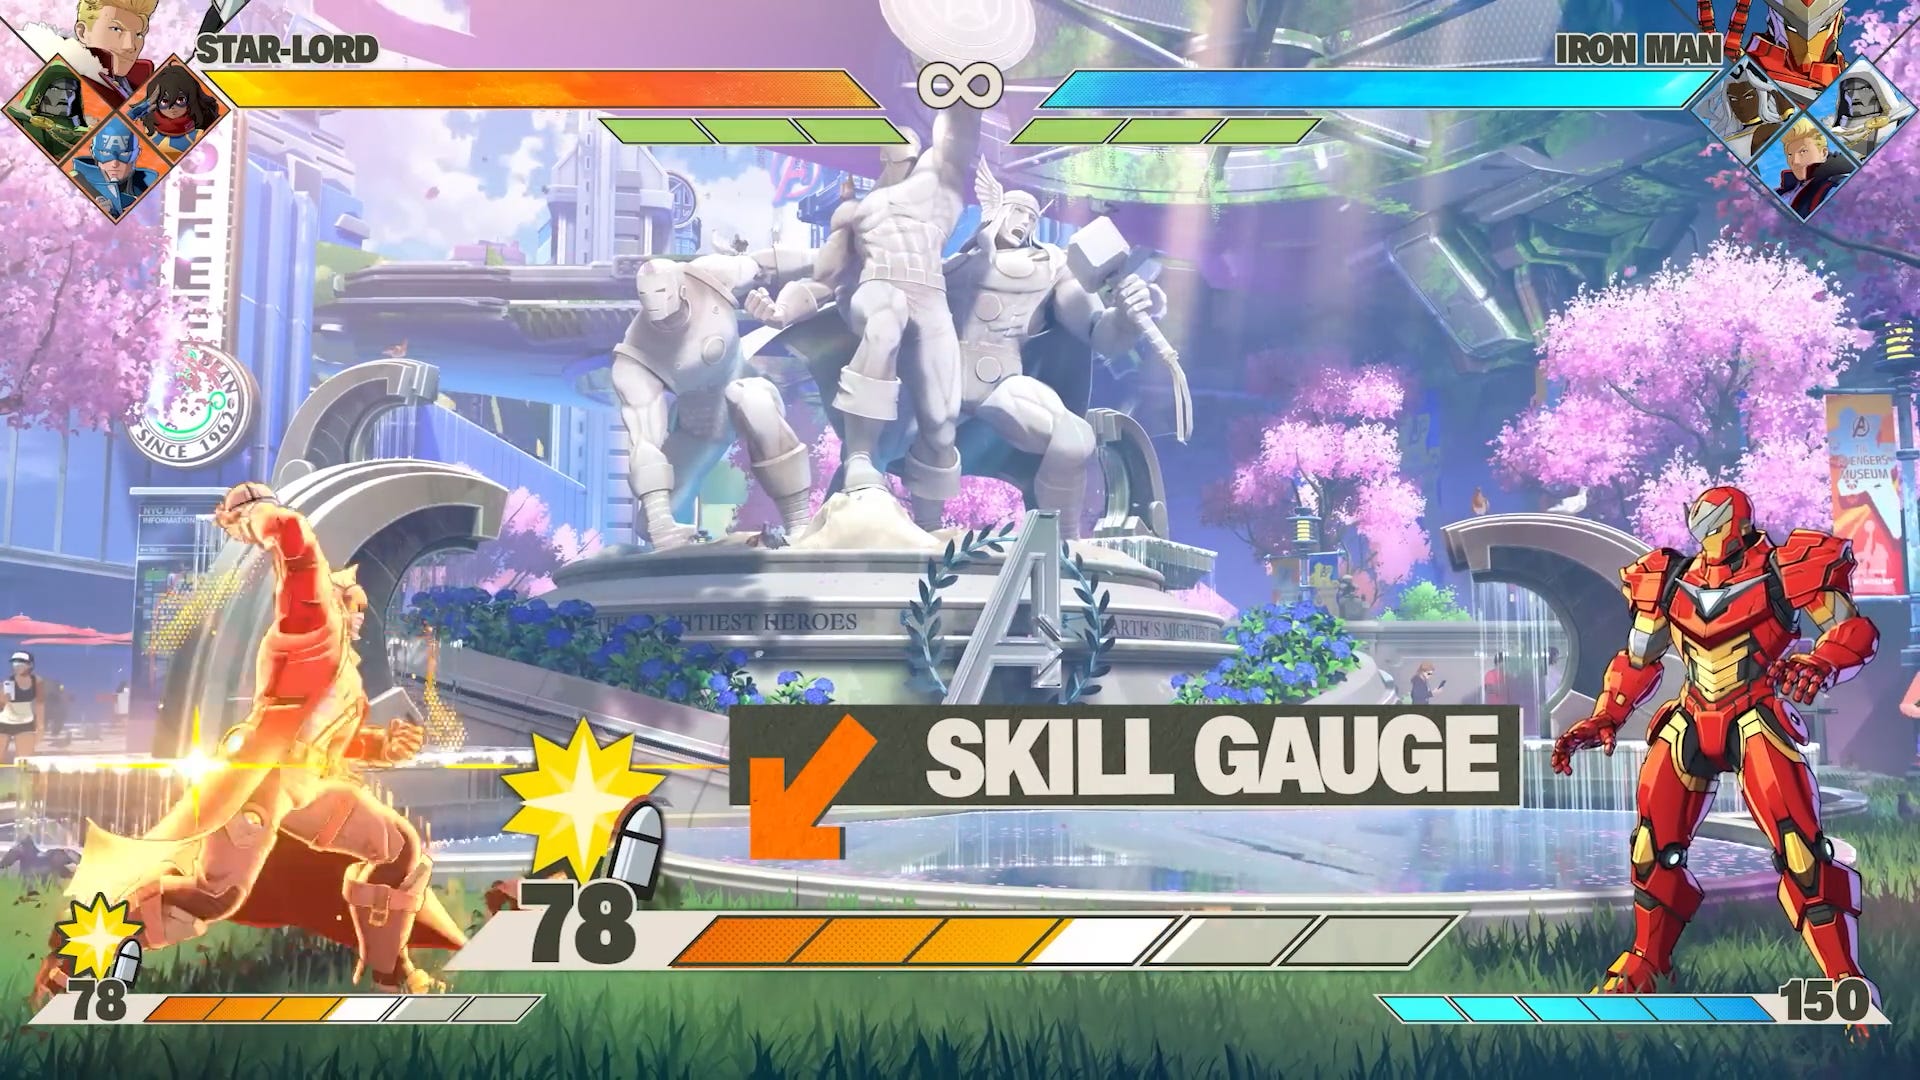
Supers cost 50 meter, level 2 supers (“Ultimate Skills”) cost 100 meter, and level 3 supers (“Tōkon Assemble) cost 150 meter.
Team Mechanics
Assemble Smash
Costs 1 Bar of Assembly Gauge
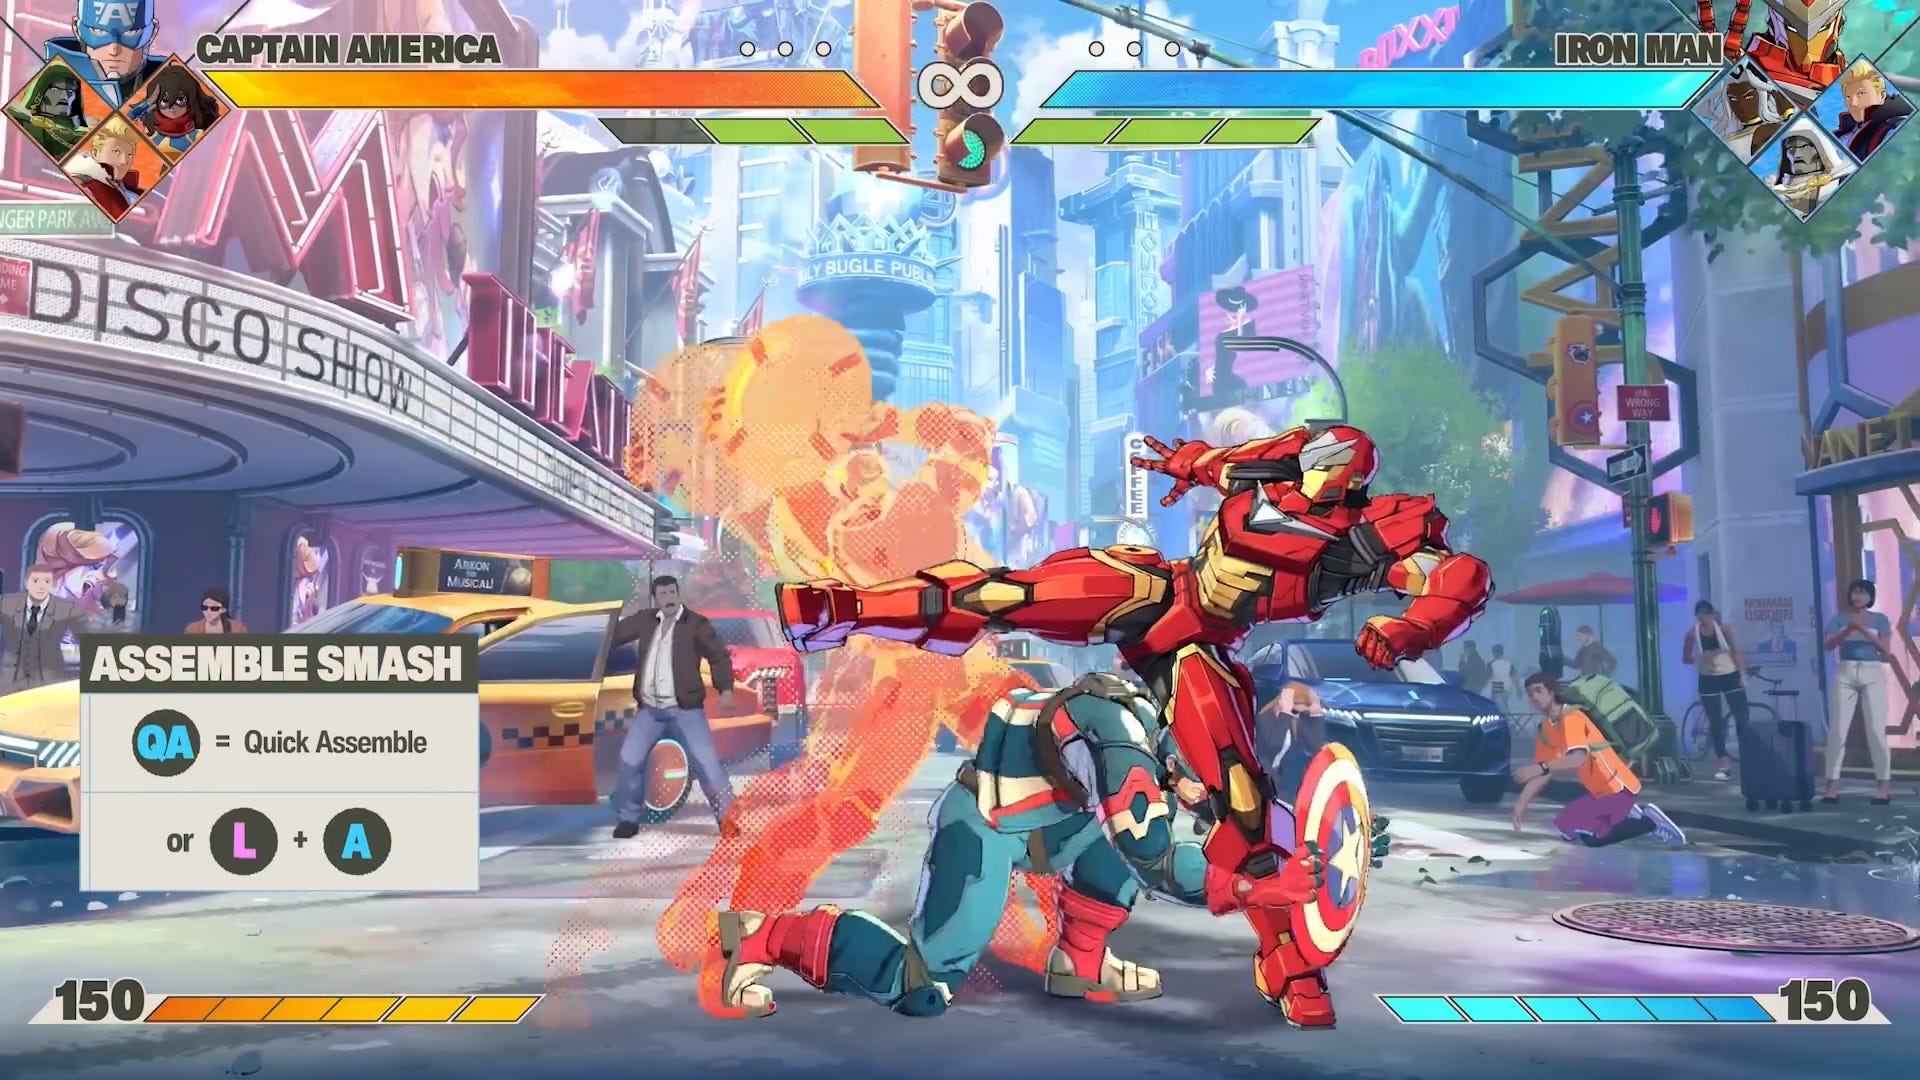
On the ground, Assemble Smash is a mix of a universal overhead and Drive Impact from Street Fighter 6. You press the Quick Assemble button (or Light Attack+Assemble) to do an advancing overhead attack with some amount of hyper armor. In my limited testing, it needs pretty precise timing to get through multihit projectiles, so it seems like the armor goes away before the attack becomes active. For example, if I set the training dummy to reversal 5L, and then I do 5H canceled into Assemble Smash, I get hit out of Assemble Smash every time.
The startup is 26 frames, so it’s blockable on reaction. It’s -5 on block, so unless the attacker uses an assist to keep up their pressure afterward, the defender can safely take their afterward.
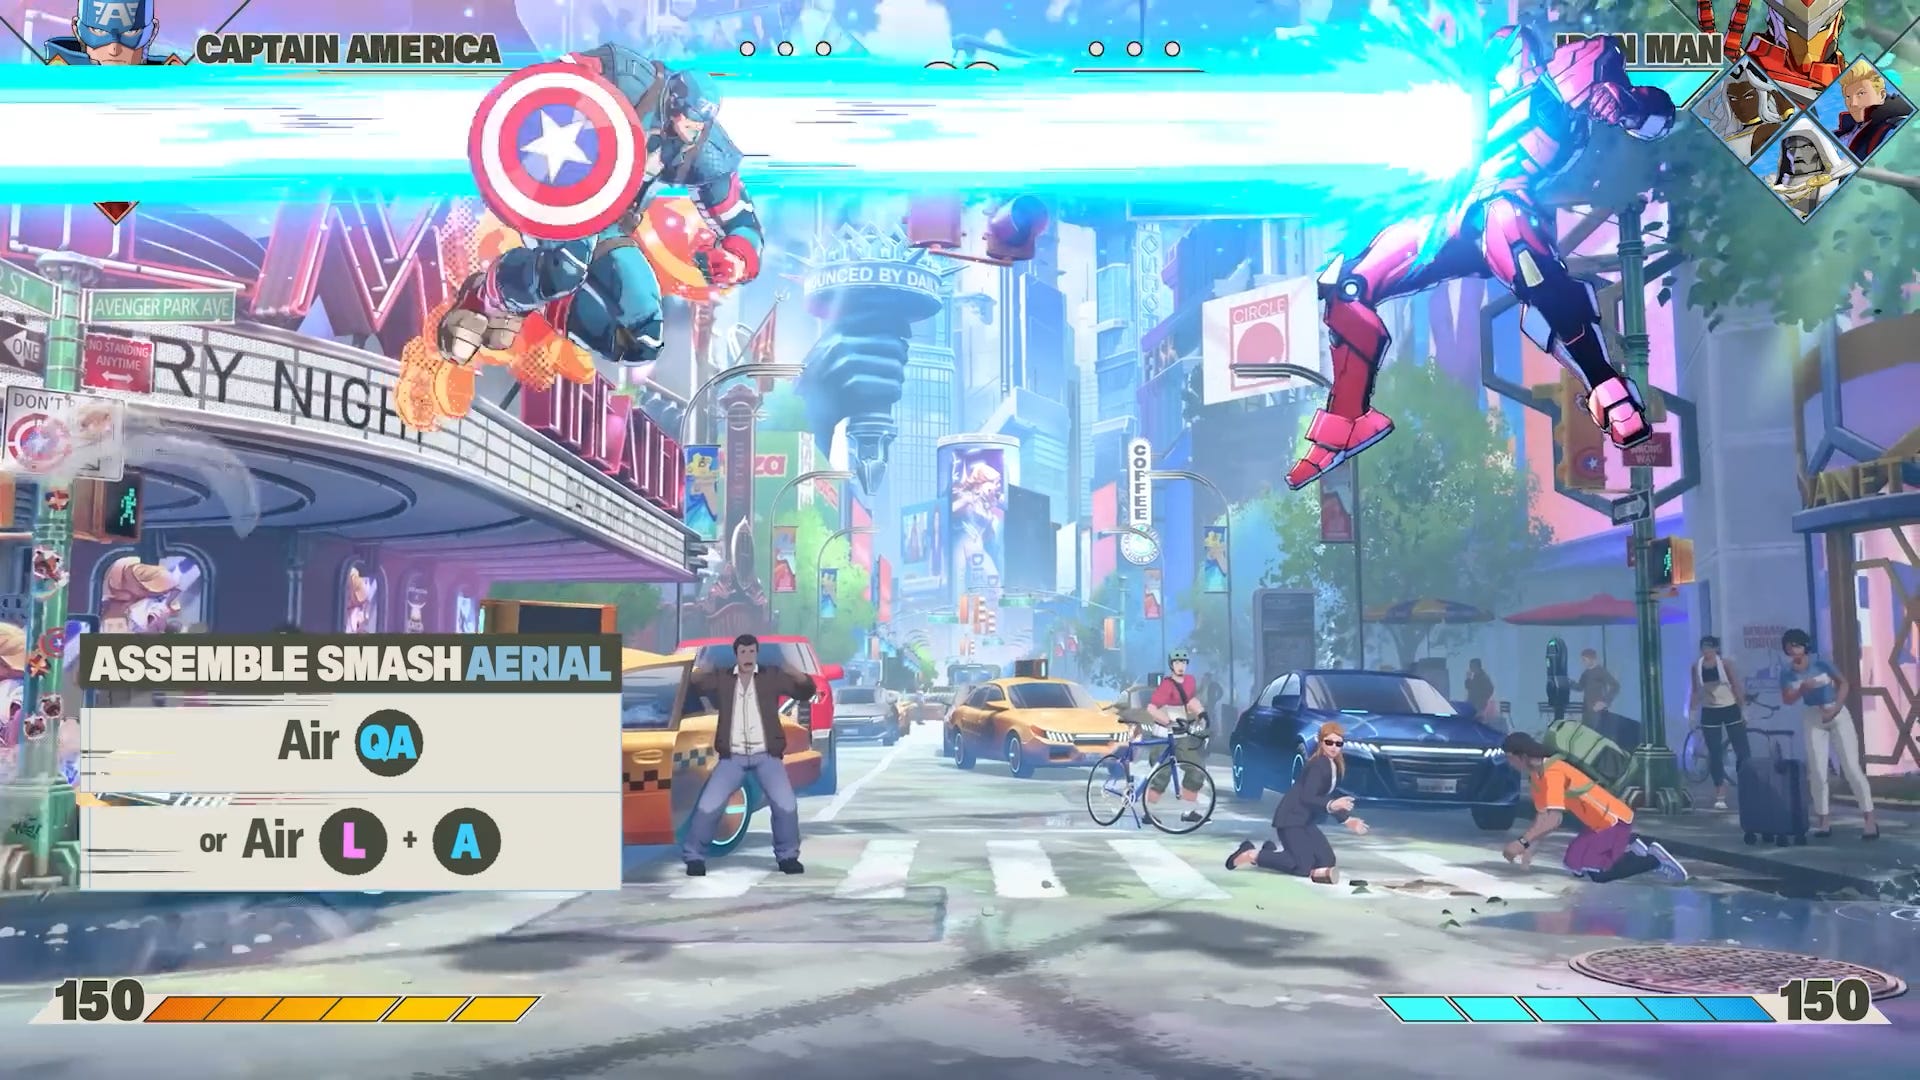
The air version of Assemble Smash is a bootleg DBFZ super dash, where you advance forward with an attack while nullifying projectiles. From my limited testing, it seems like this can work as a hard callout, but if you do it randomly, you’ll get blown up. The max range seems to be around two-thirds of the screen. At that distance, it takes ~27 frames to get to the opponent (quite a while). It’s unsafe on block (-11 or -12), and the opponent can also easily raw 2H it if they see it coming.
Assemble Counter
Costs up to 1 Bar of Assembly Gauge
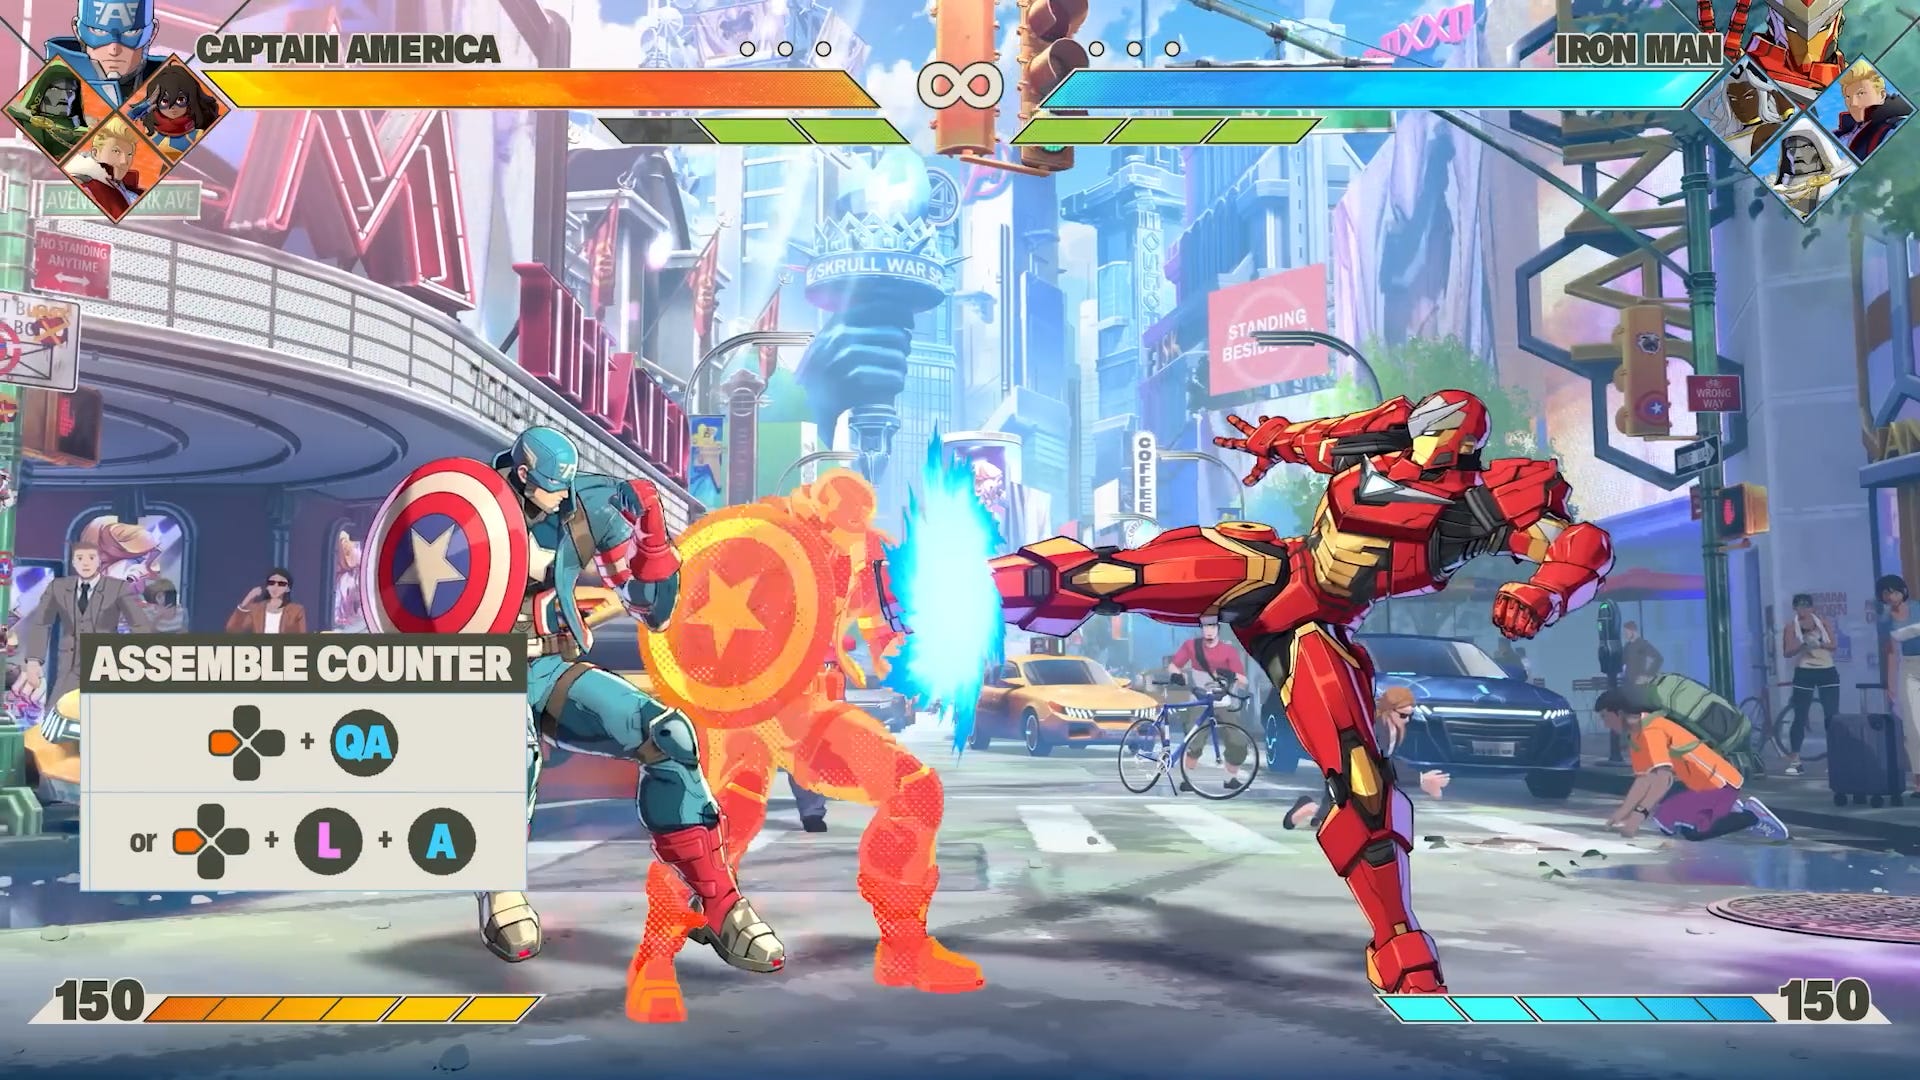
Assemble Counter seems most similar to V-Shift from Street Fighter V. You press 4+Quick Assemble or 4+Light Attack+Assemble (you can also down it while crouch blocking, so 1+Quick Assemble works too) to do a back dash that will counter attacks if they make contact with you as you move backwards. It works against projectiles too, but if the opposing character is too far away, the Assemble Counter attack will whiff. It’s punishable during recovery, so you can be blown up pretty badly for overusing this.
You can do it without actually having any Assembly Gauge available, but then you don’t get any follow-up attack from your teammate if it lands.
Super Assemble
Costs 1 Bar of Assembly Gauge plus 50 Skill Gauge
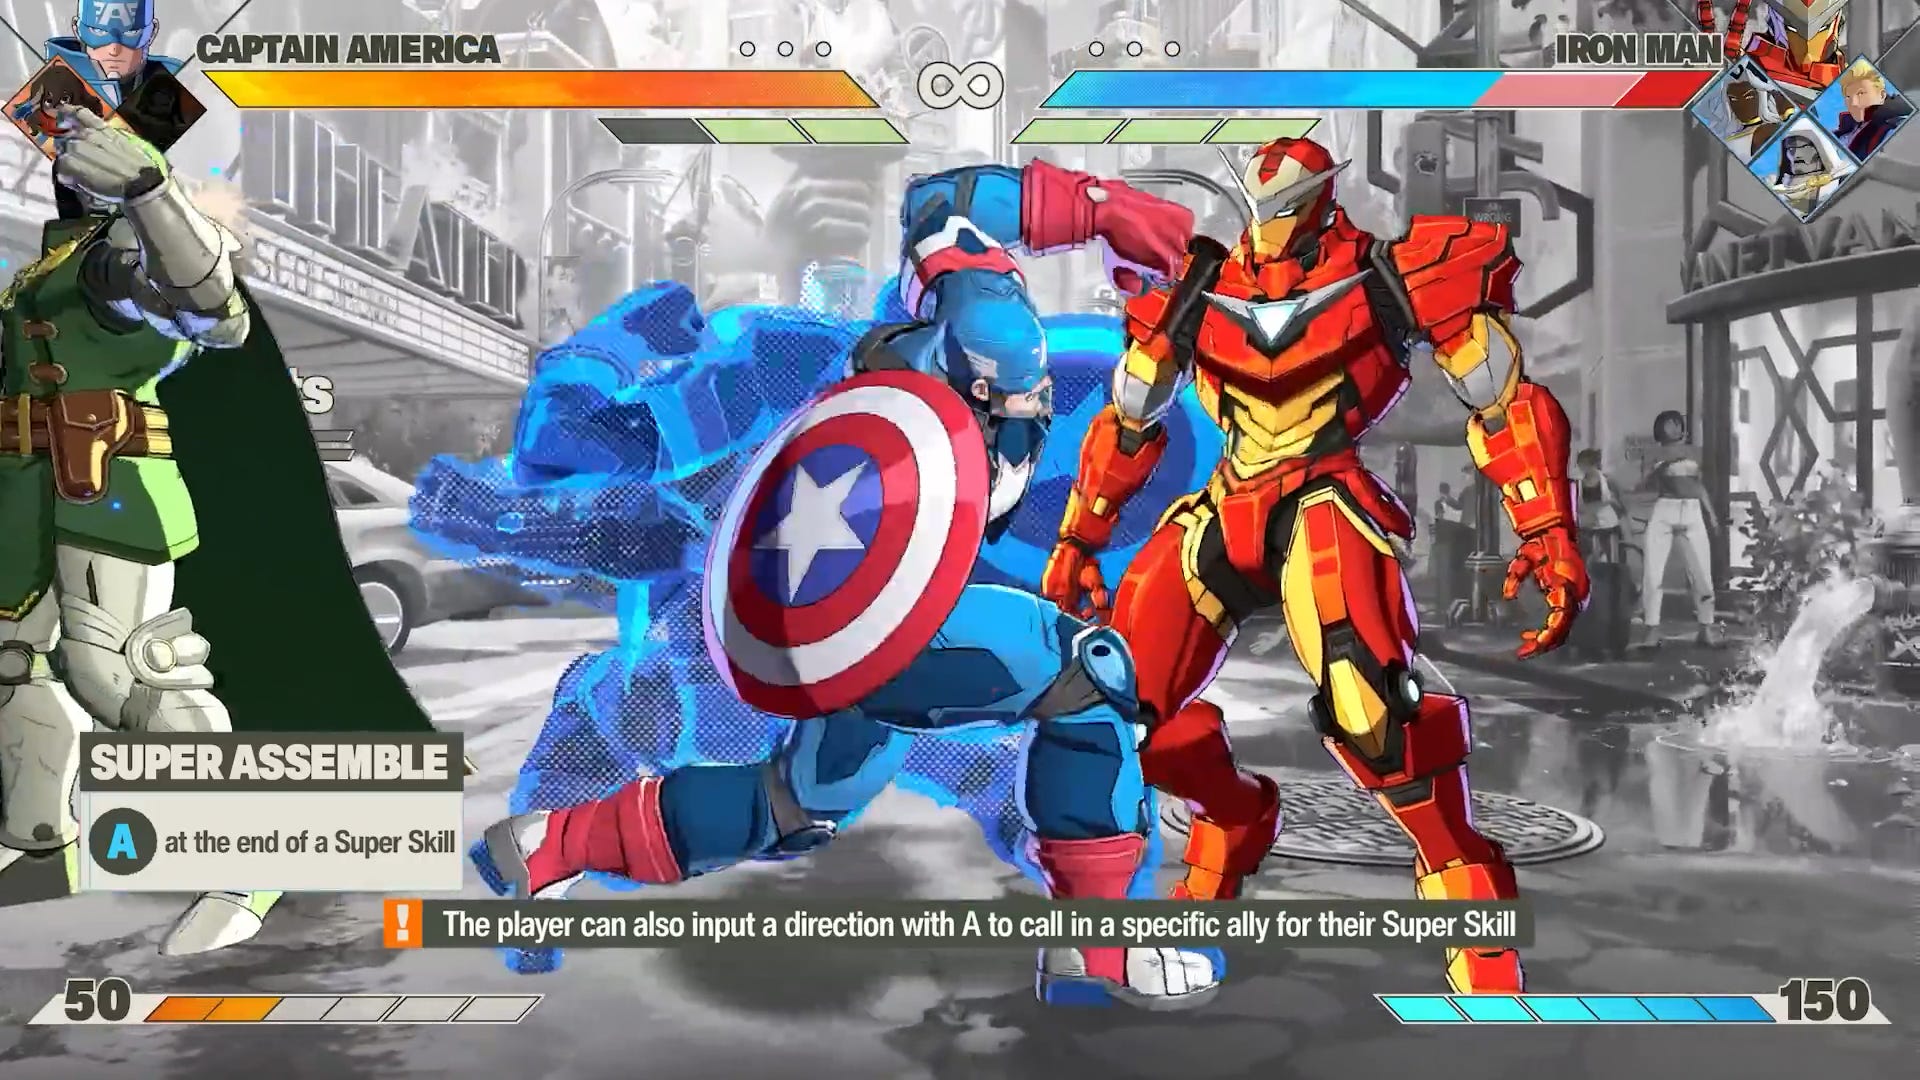
This is just a DHC. It’s done by pressing Assemble during a character’s super (only on hit). You can do up to two in a row, and you choose the next character using the same directional inputs as you’d use for tag or assist.
Crossover and Crossover Reflect
Costs 1 Bar of Assembly Gauge
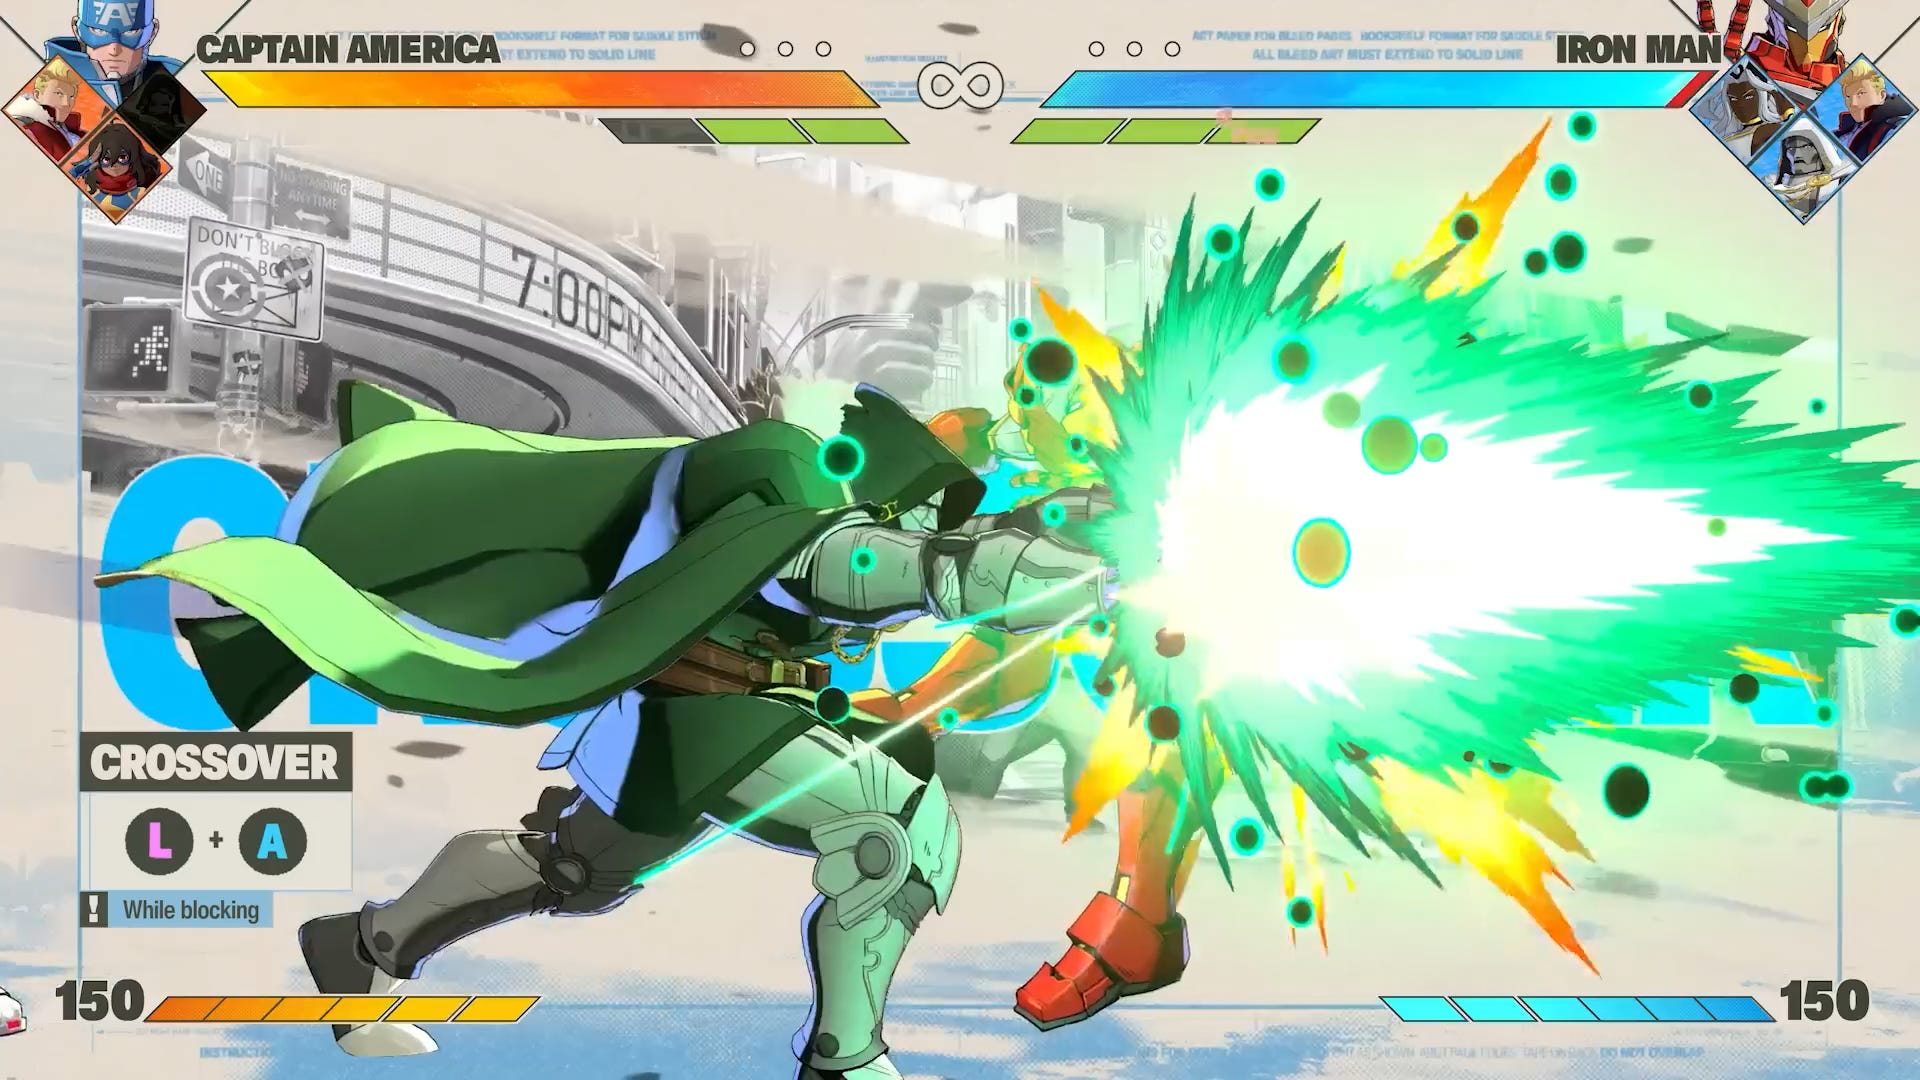
Done by pressing Light Attack+Assemble while blocking, this is an alpha counter with a hint of Xrd Blitz Shield. If your opponent doesn’t do anything, you get a knockdown and get pressure afterward. However, your opponent can react with their own Crossover (they call this Crossover Reflect). If they do this, it seems to put you back to neutral. If you do Crossover Reflect with the right timing though, you get a Perfect Reflect, and instead of resetting to neutral, you knock them down and get offensive momentum and put the opponent into a Disassembled state.
So after you do a Crossover Reflect, the possible sequences are:
Opposing Player Doesn’t Crossover Reflect Back: Player 1 is blocking > Player 1 does a Crossover > Player 2 doesn’t react = Player 1 is rewarded with offense/pressure afterward
Opposing Player Does Crossover Reflect Back: Player 1 is blocking > Player 1 does a Crossover > Player 2 reacts with Crossover Reflect = Players are reset to neutral
Opposing Play Does Perfect Crossover Reflect Back: Player 1 is blocking > Player 1 does a Crossover > Player 2 reacts with a perfectly timed Crossover Reflect = Player 2 is rewarded with very strong offense
How this actually plays out once players get more time with the game will depend on how difficult it is to react to Crossovers and how difficult the just frame timing is. If it’s difficult to react to Crossovers at all, offense will feel very weak (as long as the defender has a bar of assembly gauge, anyway). On the opposite end, if players get to the point where they can semi-reliably do Perfect Reflects, Crossovers will become garbage (unless the attacker doesn’t have any assembly gauge to counter with).
Perfect Reflects putting the opposing team into Disassembled state seem likely to tip the balance toward making Crossovers a risky proposition. You’re stuck in Disassembled for ~10 seconds, and you cannot use any of the team mechanics in the game until it’s over—you’re in a really rough spot.
Tactics and Match Structure
Offense
One of the earliest things I try to lab out in a new game is a very basic offensive framework. I’m trying to figure out the answer to the question, “If I can get next to my opponent and get them blocking something, how do I capitalize on that?”
Thankfully, modern games like Tōkon have in-game frame data and move property information, so we can figure out the basics pretty quickly.
Tōkon continues the strong modern-day fighting game tradition of “damn near everything is negative on block.” A lot of frame data across characters’ normals is very similar. I’ll use Doctor Doom for my frame data examples, but other characters are very similar:
Best I can tell, the fastest light normals in game are 6F, so everything in that table above except for 5L and 2L is punishable on block. How can you get your offense going?
The answer is stagger pressure. As I mentioned before, it seems that you can only do four moves in a row when chaining normals together. For any given character, I’m trying to find the best four normals to use that meet a few criteria:
It’s a true block string (my opponent couldn’t interrupt the sequence even if with something fully invincible).
The final normal can be special-canceled into a special that’s safe on block.
The cancel into that special is a true block string.
If I notice the opponent get hit, I can confirm into a combo.
I can delay the moves in the sequence to frame trap.
That sounds like a lot, but it’s pretty easy. For example, for Doctor Doom, I can do 5L > 2M > 5M > 5H xx 236P (light Auric Ray, i.e., his beam).
If I do the sequence as fast as possible, there are no gaps, and the light beam is -3 on block, so I cannot be punished. I can delay any of the hits (or the final special cancel) to frame trap my opponent to blow up mashing. This brings us pretty quickly to normal fighting game RPS/conditioning:
I will frame trap my opponent until they stop mashing. If they never stop mashing, I will never stop frame trapping them and take the free win.
If they stop mashing, I can:
Look for a throw or other mix-up opportunities or
Steal turns
With assists available, it becomes much easier to keep the pressure going, since you can always call an assist right as your final attack is blocked to give yourself some amount of frame advantage.
The game’s unique defensive options will come into play as well. Frame traps/staggered normals will lose to Assemble Counter (4L+A, i.e., the V-Shift equivalent), so I’m not 100% certain how the risk/reward will play out for the attacking and defending players. The important thing is to have some kind basic structure in mind. Later on, you’ll likely discover other options to consider, and you’ll also need to incorporate answers to defensive strategies you may not have anticipated.
Other Random Thoughts and Unanswered Questions
The game doesn’t even properly come out for another two weeks, so it’d be crazy to think we have any real idea of what high-level play will look like.
Personally, I’m wondering about this like how much team synergy actually matters (it doesn’t seem terribly important at the moment) and how viable will zoning be as a strategy.
Anyway, please let me know if you spot any factual errors or omissions here and I can update the post accordingly. Time for me to get back to the beta.